Home Made Cupcake

Tampilkan postingan dengan label less than 250 calories. Tampilkan semua postingan

Minggu, 02 Maret 2014

morning cookies (vegan and gluten free!)

Posted By: Rynisma - 16.52

I know, I know. "Morning cookie" seems like an oxymoron, or at least a poor choice, but I promise it isn't. This recipe was born out of my need for a healthy, portable, no-refrigeration-needed snack that I could have in the middle of the morning to tide me over until lunch. I had been buying granola bars for years to help with this issue, until I got fed up with the high prices and high sugar (this recipe has none!) and decided to just make them myself. 
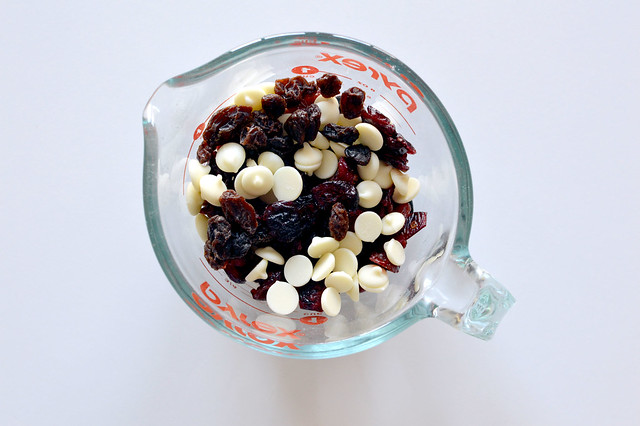

Another fantastic thing about these cookies is that they help me use up the awkward few tablespoons of mix-ins that are always left over from other recipes. 1/4 cup of nuts from this, a few tablespoons of raisins from that, the bottom of a bag from that other thing - you know how it goes! While you can absolutely use specific ingredients for mix-ins, I like to just use whatever mix of dried fruit, nuts, and chips I have on hand. 
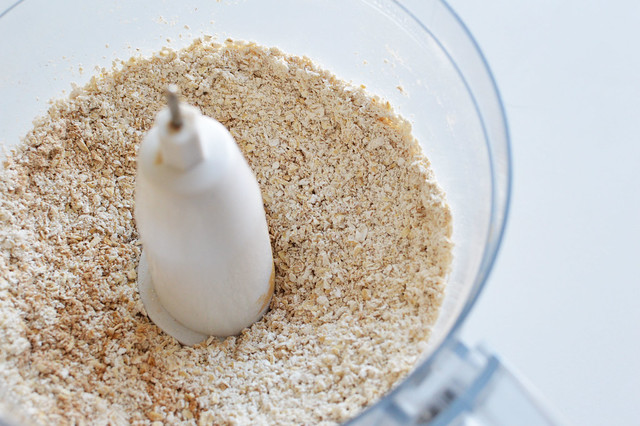

As if this recipe needed a third bonus, it's all made in the food processor. I will always be appreciative of a single dirty bowl. If you don't have any quick oats on hand, you can put old fashioned in the processor first and give it a few good pulses. Ta da! The quick oats have been made.
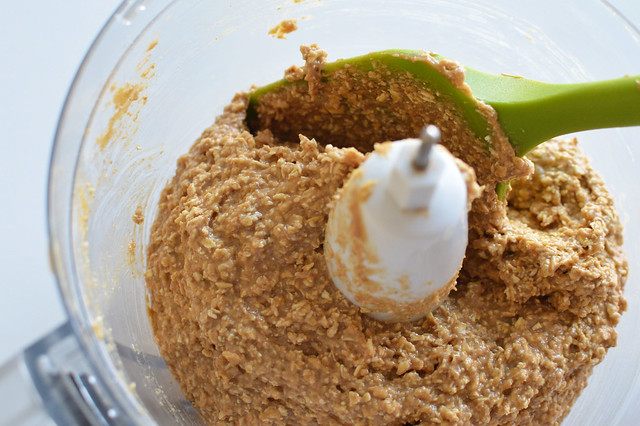

After adding in a banana, nut butter (I use peanut, but you can use almost anything!), applesauce, maple syrup, and a few spices, you have a fantastic cookie base that is delicious on its own. But, we all know we're not going to stop there. Time to get creative with the mix-ins!
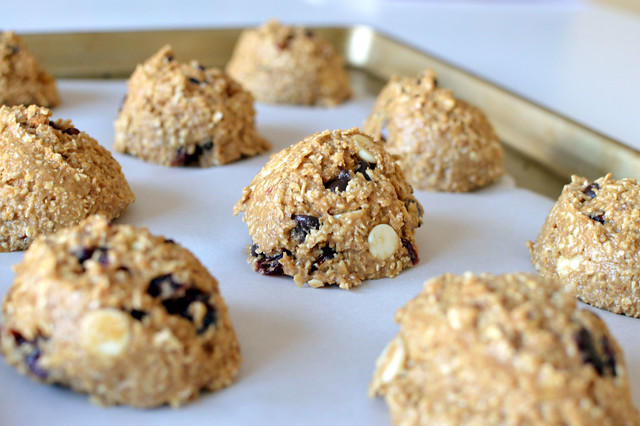

I use my largest cookie scoop, which holds a scant 1/4 cup, for above-average size cookies. My batches usually yield around 9, more than enough for the week, but you can feel free to make yours bigger or smaller - just remember to adjust your baking time!


These guys don't like to spread on their own, so I like to aid the process by pressing them down with the bottom of a drinking glass about halfway through the baking process. It's also important to let them cool completely before trying to remove them from the pan, since they're a little more baked-oatmeal and a little less regular-cookie when hot. Don't worry, after 10-15 minutes they are ready to be bagged or snacked on for the week ahead!


Morning Cookies (Vegan, Gluten Free, No Refined Sugar)
Adapted from Joy the Baker 
Yields 9

Ingredients

2 cups quick oats
1/2 teaspoon salt
1/2 teaspoon cinnamon
1/2 teaspoon nutmeg
3/4 cup peanut butter (or the nut butter of your choice)
1/4 cup maple syrup (I used sugar-free, but regular or honey will also work)
1/2 cup mashed banana
1/2 tsp vanilla
1-1 1/2 cups mix-ins

Directions

1. Preheat oven to 325 degrees.
2. Combine all ingredients except for mix-ins in food processor until combined, about 2-3 minutes, scraping the sides of the bowl every minute. (Note: If using old fashioned oats, add them first, pulse 5-6 times to break them down, then all remaining ingredients). 
3. Stir in mix-ins by hand until well combined.
4. Drop 1/4 inch scoops onto a parchment-lined baking sheet.
5. Bake for 15-16 minutes, edges will be golden brown, pressing cookies with a glass about halfway through. Let cool. 

Nutrition: 

Calories: 265, Fat: 13g, Carbs: 32g, Fiber: 4.31g, Sugars: 13.8g, Protein: 8.3g

Happy baking!

Amanda

Senin, 27 Juni 2011

1:1 berry cobber

Posted By: Rynisma - 13.09
DSC_0467 sm


i'm officially moved, settled and trying to get my act together and start blogging again.

in hopes that you will forgive me for being away for so long i'm offering up this recipe that is a seemingly impossible combination of easy and delicious. seriously, you usually have to pick between one or the other, but this baby blows that theory right out of the water.

i've been doing my best to take advantage of all the berries that are coming into season right now by going to pick them myself. there's just something about coming home with red fingers and scraped ankles and pounds and pounds of berries. 


DSC_0469 sm

this recipe calls for 2 1/2 to 3 cups of berries, which is about the same amount of batter used, hence the 1:1 title. i used a combination of strawberries, blueberries, blackberries and a handful of cherries. i just realized cherries might not technically be a berry? can anyone confirm or deny this? they do end in "erry", but i'm not convinced.


DSC_0478 sm


basically, you stick a few tablespoons on butter in the pan while your oven is preheating and let it get warm and melty. whip up the batter, stick in the berries, cover with pecans and brown sugar and you're done! seriously, how easy is that?

DSC_0485 sm


warning: when you take this pan out of the oven you will be tempted to dig right in. seriously, it smells that good. when i ran my knife around the edge of the pan and caught a rogue berry i thought it would be smart to pop it in my mouth. boy, i was wrong. molten hot berry lava, as it turns out, equals major mouth burning.

DSC_0496 sm

but, if you have the self control to ignore it and let it cool you will have a summery, seasonal and scrumptious dessert on your hands. i quickly threw together some whipped cream to dollop on top, it's the boyfriend's favorite, but you could easily use cool whip, ice cream, or just let the cake fly solo. 

to close, thank you for bearing with me during my brief hiatus. now that i'm settled i'm really looking forward to getting back into the swing of things blog-wise. i've missed you all!

1:1 berry cobbler

serves 9 

ingredients

2 tablespoons butter
3/4 cup all purpose flour
3/4 cup granulated sugar
3/4 cup milk
1 teaspoon baking powder
1/4 teaspoon cinnamon
1/4 teaspoon salt
2 1/2 to 3 cups chopped fruit
1/4 cup pecans (optional)
1/4 cup brown sugar

1. preheat oven to 375 degrees. add butter to 8x8 baking pan and place in oven during preheat. keep an eye on it and make sure to take it out once the butter is completely melted.

2. coarsely chop fruit and set aside.

3. in a mixing bowl, whisk together flour, granulated sugar, baking powder, cinnamon and salt. add milk and continue to whisk until batter has no lumps.

4. in baking pan with melted butter, pour batter in but do not stir! the butter will pool around the sides and top - this is totally okay.

5. place berries evenly over batter and sprinkle with nuts and brown sugar. bake for 45-50 minutes or until golden brown and tests done.


nutritional information:

calories: 219, fat: 7.14g, cholesterol: 7mg, sodium: 133mg, carbs: 37g, fiber: 2.18g, sugars: 25g, protein: 2.84g.


as always, thank you for reading & happy baking!

amanda

Minggu, 10 April 2011

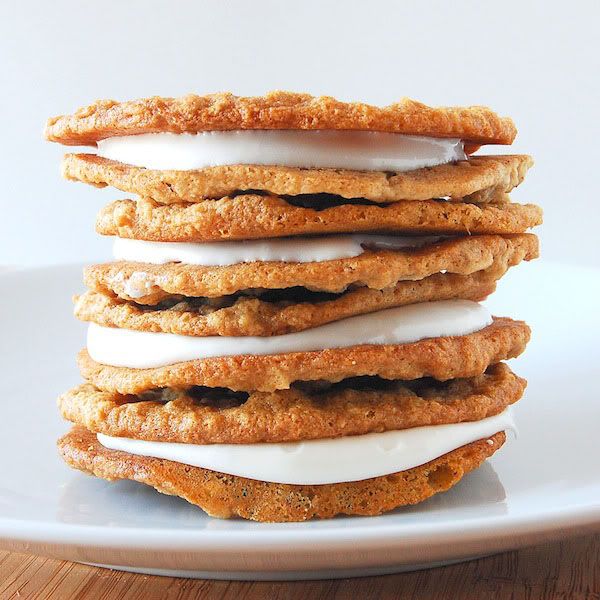
homemade oatmeal creme pie!

Posted By: Rynisma - 19.36


disclaimer: these are not healthy. that being said, they are so addictive that i gave myself a stomach ache before the gooey filling had even been made. 

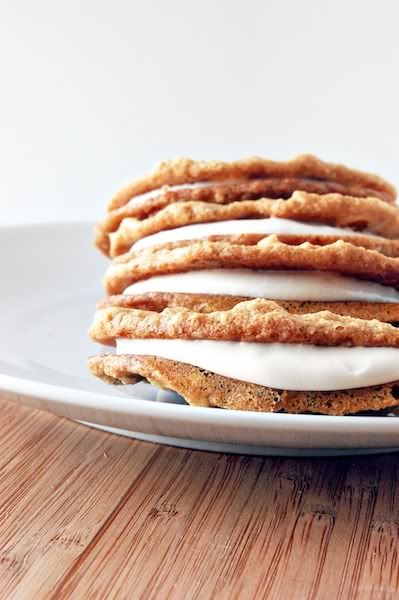
my second admission is that i've never actually had a real-deal little debbie oatmeal creme pie. some people might consider this good parenting and others might consider it child neglect, but my snack of choice as a child was a little thing called a pastelito de guayaba (sweet puff pastry filled with guava, or quince). but, i've decided to give this little debbie a chance considering how many people confused my zebra cake with one of deb's concoctions. since the most requested snack was her oatmeal creme pie i decided to whip up a batch! 


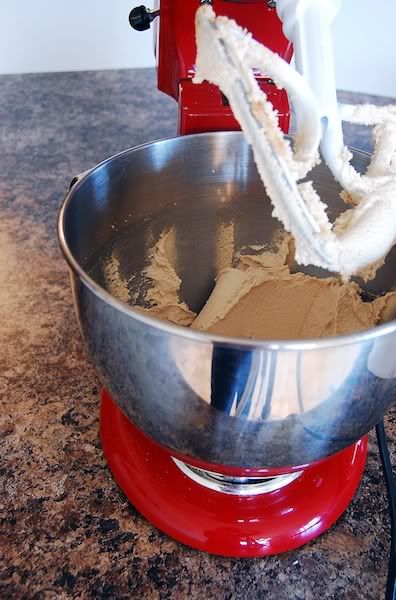
first, like with any good recipe, you start by creaming a ton of butter and sugar. granted, i got five dozen cookies out of this recipe, so feel free to cut the recipe in half.


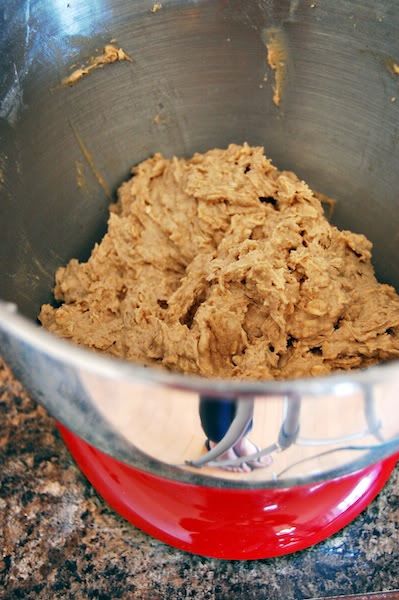
the batter is this gorgeous peanut-buttery color and makes delicious oatmeal cookies on its own. i honestly couldn't keep my fingers out of this batter and am guessing 3-4 cookies worth of dough fell victim to my cravings. 

(side note: i didn't realize you could see my rolled jeans & flip flops reflected in the bowl! it was almost 80 degrees in michigan today and i broke out my favorite shoes for the event.)


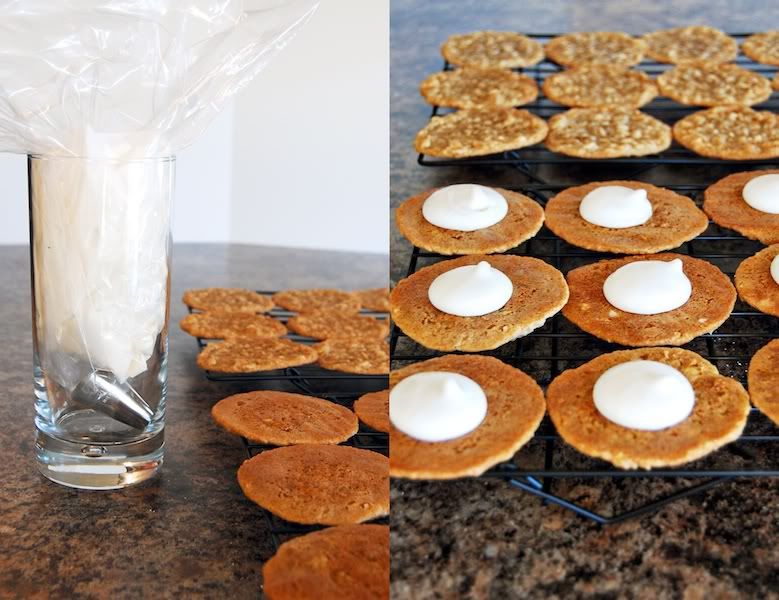
to pipe my delicious filling between my cookies i used a large sized round piping tip, but you could just as easily use a knife and just spread it on. the icing might seem a little unruly as you're making your sandwiches, but don't worry! it does set after about an hour, which then makes it super easy to put in baggies or stack for portability. 


not to brag, but i think i gave debbie a run for her money with these babies. the cookies themselves are hearty, delicious, and soft without falling apart. the addition of the marshmallow-vanilla filling takes it to a whole new level of fantastic. though making these is not a particularly fast process, i think it's totally worth it to relive your childhood and bring on the nostalgia.


homemade oatmeal creme pie

yields 30 sandwiches (plus 8-10 leftover cookies!)
adapted from beantown baker

for the cookies:

3/4 cup unsalted butter, softened
2 cups packed light brown sugar
2 eggs
1/2 teaspoon salt
2 cups flour (i used 1 cup all-purpose & 1 cup whole wheat pastry)
1 teaspoon baking powder
1 teaspoon cinnamon
2 cups quick oats
2 teaspoons baking soda
3 tablespoons boiling water

for the filling:

1 stick unsalted butter
1 jar marshmallow fluff
1 teaspoon vanilla
1 1/4 cup confectioner's sugar


1. cream butter and sugar in the bowl of a stand mixer. once light and fluffy, add egg and mix until combined.

2. in a separate bowl, whisk together salt, flour, and baking power. add to creamed mixture. add cinnamon and oats and mix well.

3. in a small dish, add baking soda to boiling water and stir mixture into batter. mix well.

4. chill dough for 1-2 hours in fridge to let cool. 

5. preheat oven to 375 degrees and lined cookie sheet with parchment. 

6. drop tablespoons of dough onto sheet about two inches apart and bake for 8-9 minutes or until cookies are firm and golden around the edges. let cookies stand on sheet for 5 minutes and then transfer to wire rack.

7. to make filling, whip butter in a stand mixer to soften. add jar of marshmallow and beat until fluffy. add powdered sugar 1/4 cup at a time until combined. add vanilla and combine.

8. spread or pipe filling onto cool cookies and allow to set for 1-2 hours.


nutritional information:

calories: 213, fat: 6.67g, cholesterol: 23mg, sodium: 74mg, carbs: 18g, sugars: 13g, protein: 1.7g.


thanks for reading & happy baking!

amanda

Selasa, 05 April 2011

slimmed down zebra cake with chocolate frosting (a reader request!)

Posted By: Rynisma - 18.03

because one of my favorite parts of having this blog is getting to interact with all you out there in internet-land, it shouldn't come as too much of a surprise that when one of my readers emailed me asking for my help in slimming down a zebra cake i jumped at the chance.

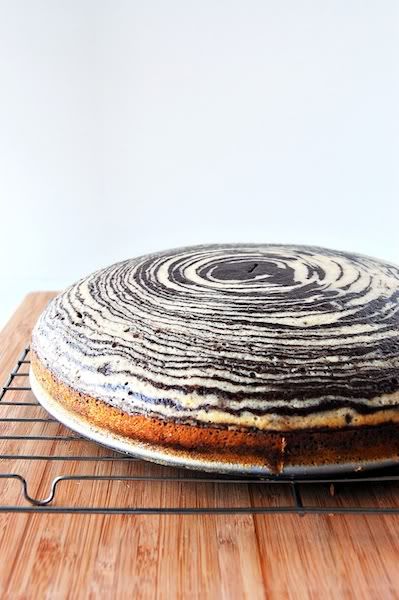
this was my first time attempting this recipe and i think there is definitely room for improvement, especially in the stripes, but i will - as always! - share my mistakes with you so that only one of us has to make them. 


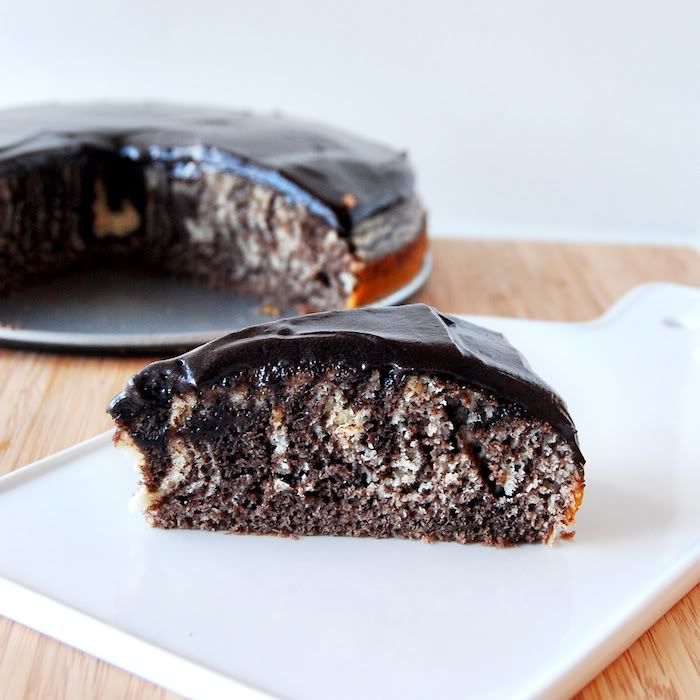
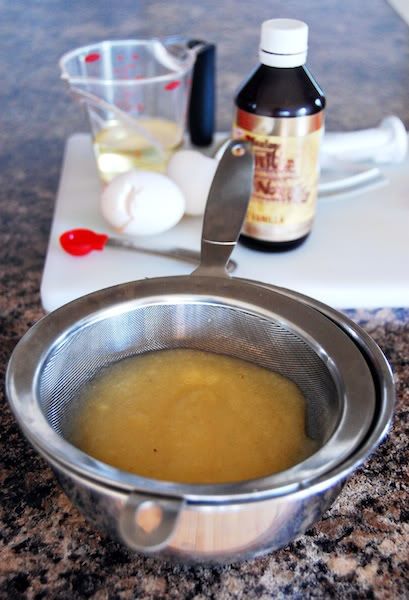
i cut this cake down from over 400 calories a slice to around 250 calories and i've gotta say, i'm pretty proud of myself. i substituted some of the vegetable oil for drained applesauce, which is a great ingredient to swap out for fats, and i made a few adjustments to the eggs and sugar quantities. 


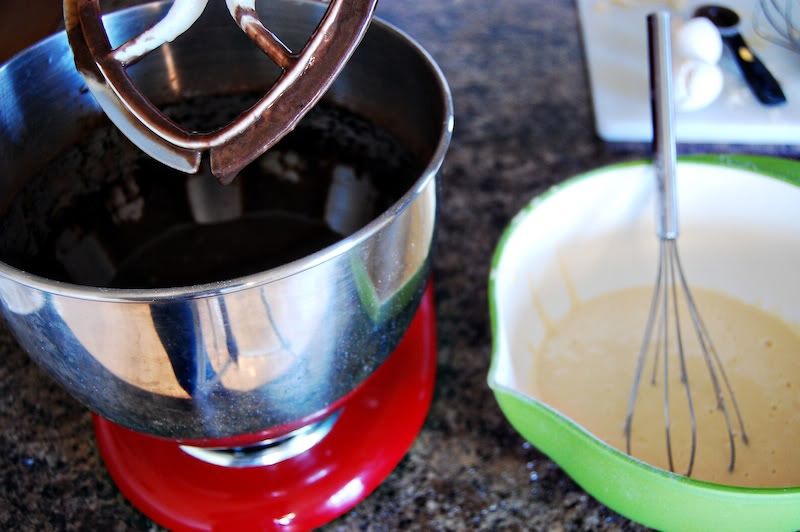
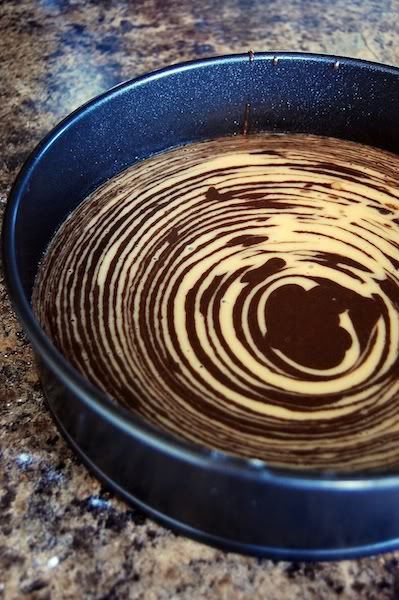
the secret to putting the "zebra" in zebra cake is splitting the batter in half once it's completely mixed, which is way more convenient than making two batters. cocoa powder gets added to one while the other remains plain.


the rings are formed by dropping alternating dollops of chocolate and plain batter on top of each other. i did around two tablespoons per dollop, which i think led to my aesthetic downfall, and will definitely opt for a 1/4 cup size next time. i think it will make it look more like the animal print i so love and less like i'm trying to see how old a tree is.


so, my dear readers, you can totally stop here and have a delicious and gorgeous cake. maybe a light dusting of powdered sugar? something simple and elegant? 


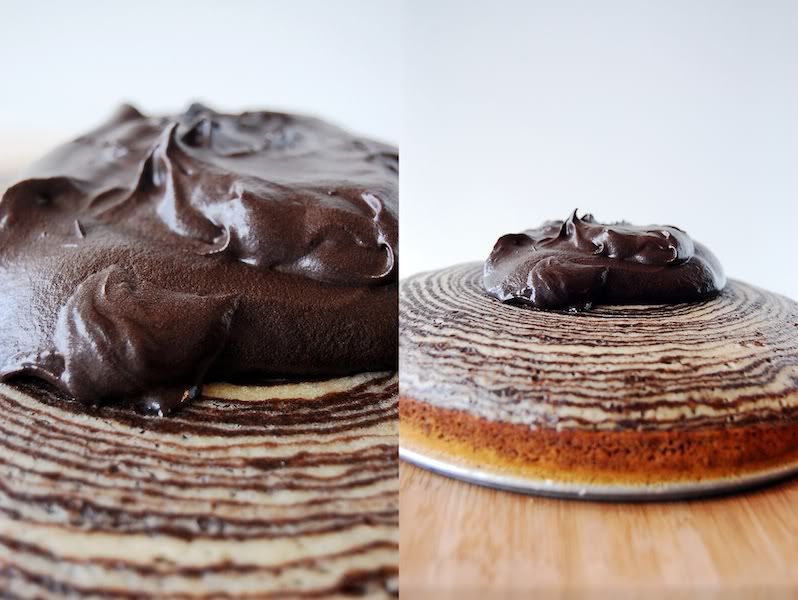
or..you could go a different route. like i did. okay, let me rewind a bit. i was in the middle of basking in the pride of cutting the calories of this cake pretty much in half when i decided that frosting was in order. yup, gooey, decadent, dark chocolate frosting. so far from simple and elegant. i just couldn't help myself.

feel free to take either approach to this cake. you can use the excuse, like i did, that covering the top in frosting makes the cake more mysterious and alluring because you don't have any clue how beautiful the inside is until you cut into it. or you could be logical and enjoy 214 calories of marbled (or, in your case, probably more zebra-y) goodness.


skinny zebra cake

yields 12 slices
adapted from az cookbook

for the cake:

2 eggs
2 egg whites
3/4 cup granulated
1/3 cup vegetable oil
2/3 cup drained applesauce
2 cups all-purpose flour
1 tablespoon vanilla
1 tablespoon baking powder
3 tablespoons cocoa (the darker, the better!)
1 cup low fat buttermilk


for the icing:

3 tablespoons butter
1/2 cup powdered sugar
3 tablespoons cocoa
2-3 tablespoons skim milk
1/2 teaspoon vanilla


1. preheat oven to 350 degrees. grease 9" pan with oil or parchment. (i used a springform pan and it worked perfectly!)

2. in the bowl of a stand mixer, combine eggs, egg whites, and sugar until creamy and light in color. add buttermilk, vanilla, oil, and applesauce and beat until blended.

3. in a separate bowl, whisk together flour and baking powder. gradually add the dry ingredients to the wet ingredients and beat until the batter is smooth and fully incorporated.

4. scoop 2 cups of batter into bowl used for dry ingredients and set aside. in mixer, sift cocoa into remaining plain batter and mix.

5. using two 1/4 cup measurers, one for each flavor batter, scoop alternating flavors into the center of the baking pan, one on top of the next. do not wait until the previous circle has spread and do not tilt the pan - the mixture will spread by itself! keep working until no batter is left.

6. bake for 30-40 minutes, or until the a toothpick inserted into the center comes out clean!

7. while cake is cooling place room temperature butter into the bowl of a stand mixer and beat until smooth and soft. add 1/4 cup of powdered sugar and combine with butter. add cocoa and 1 tablespoon of milk and combine. add remaining powdered sugar and mix until creamy. add vanilla and combine. to adjust consistency of frosting, add milk 1/2 teaspoon at a time.

8. spread frosting evenly over cooled cake and chill in fridge until set.


nutritional information:


calories: 250, fat: 8.8g, cholesterol: 41mg, sodium: 156mg, carbs: 37g, fiber: 2g, sugars: 20g, protein: 5.13g. 

Minggu, 20 Maret 2011

vegan almond-flax coffee cake

Posted By: Rynisma - 18.36

last week at work one of my coworkers snuck into my office and let me know that, no pressure, he wouldn't be upset if i whipped up some vegan goodies. well, with me it's ask and you shall receive, so i decided to figure out a coffee cake recipe that would be a crowd pleaser with vegans & non-vegans alike.


i'm generally a bargain hunter and rarely very brand loyal when it comes to staples like sugar or butter, but when it comes to vegan baking earth balance non-dairy margarine is really the best of the best. it creams and whips beautifully, which has been a problem with off-brands, and it's awesome for icings. the only other thing that i think is worth splurging on are extracts. i find that mccormick and generic brands leave an artificial aftertaste that is a little off-putting to me. moral of the story: be cheap when you need to be, but splurge on the good stuff when you can!


i used an 8" round for this little project but found that the pan was a little over-filled, so i would actually recommend a 9". if you have a springform grab that, it will definitely make removal much easier. also, don't forget to flour your pan!


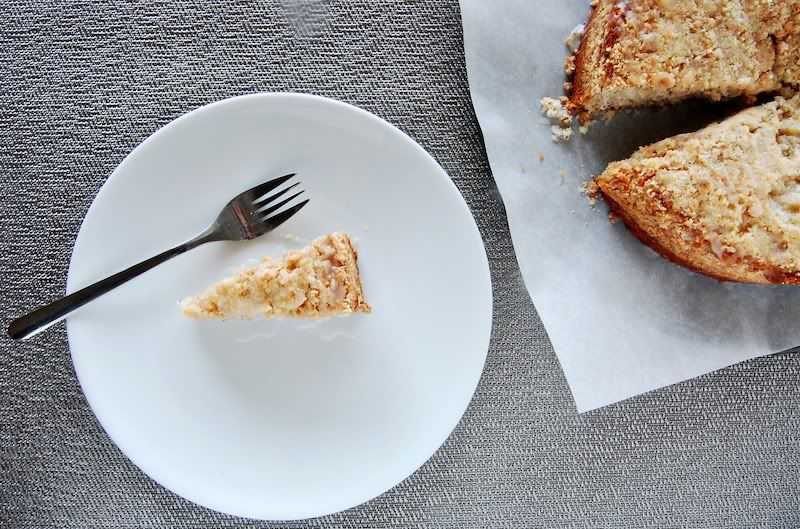
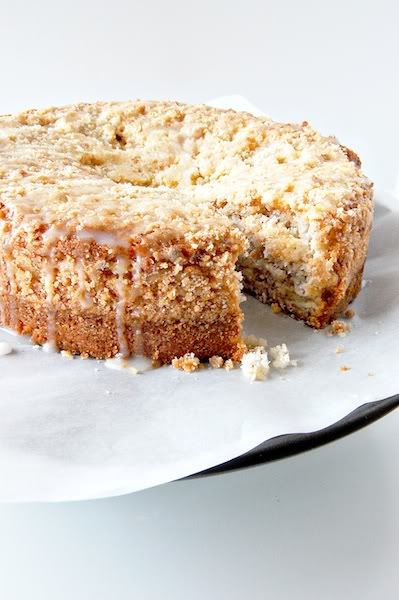
the delicate almond flavor in this cake is well-balanced by the hearty and nutty flax meal. it isn't overly sweet, which is perfect for a cake served in the morning hours, but the crumble and drizzle do give it a little crunch and sweetness that really helps bring it all together and make it treat-worthy. 


vegan almond-flax coffee cake

yields 16 servings

ingredients

for the cake:

1/2 cup almond milk
1 tablespoon vinegar
3/4 cup vegan margarine 
1 1/2 cups granulated sugar
1 1/2 teaspoons almond extract
3 tablespoons flax meal mixed with 6 tablespoons warm water
1/2 teaspoons salt
1 teaspoon baking powder
3/4 cup cake flour
1 1/4 cup all-purpose flour

for the crumble:

1/4 cup almond meal
1/4 cup granulated sugar
3 tablespoons all-purpose flour
1 tablespoon vegan margarine, melted

for the icing:

1/2 cup confectioner's sugar
1 teaspoon almond extract
1/2 - 1 tablespoon almond milk


1. combine almond milk and vinegar in a small bowl & let curdle. combine flax meal and water in another small bowl and let soak.


2. preheat oven to 350 degrees fahrenheit.

3. lightly grease and flour a 9" round or square pan.

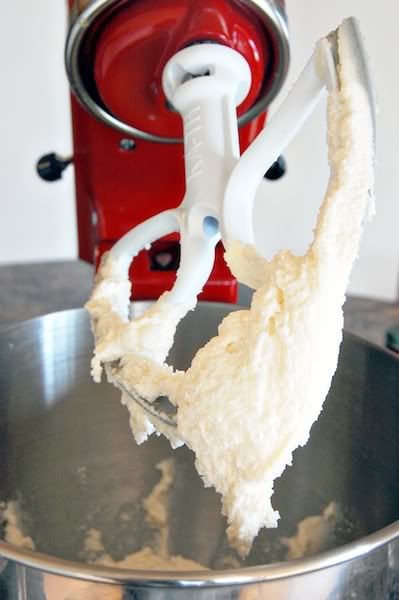
4. in the bowl of a stand mixer, cream together margarine, sugar, and almond extract until light and fluffy. add flax meal paste and beat until smooth.

5. in a separate bowl whisk together salt, baking powder, and flours. 

6. alternate adding flour mixture and vinegar mixture to mixer bowl until well combined. pour batter in to prepared pan and knock on counter several times to remove any bubbles.

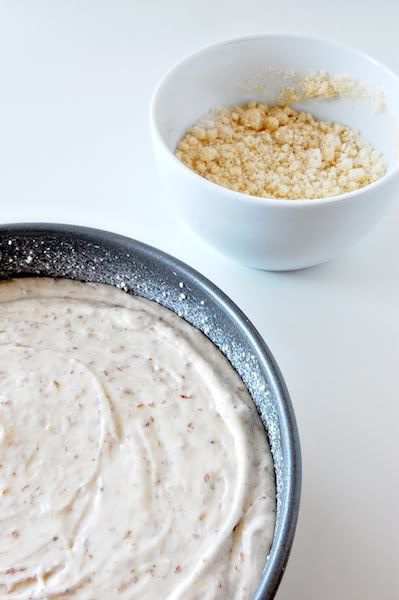
7. melt margarine in microwave safe bowl and add remaining ingredients. cut & mix with fork until there are even pebble-sized crumbles throughout.

8. spread crumbles over cake batter and pat down lightly. 

9. bake in preheated oven for 45-50 minutes or until knife inserted into center comes out clean. let cool completely.

10. once cake is cool, stir together all icing ingredients and drizzle over cake. let set and dry.


nutritional information

calories: 258, fat: 10.25g, sodium: 184 mg, carbs: 39.5g, fiber: 1g, sugars: 25, protein: 2.34g.


thanks for reading & happy baking!

amanda

Minggu, 13 Februari 2011

vegan funfetti cupcakes

Posted By: Rynisma - 17.33


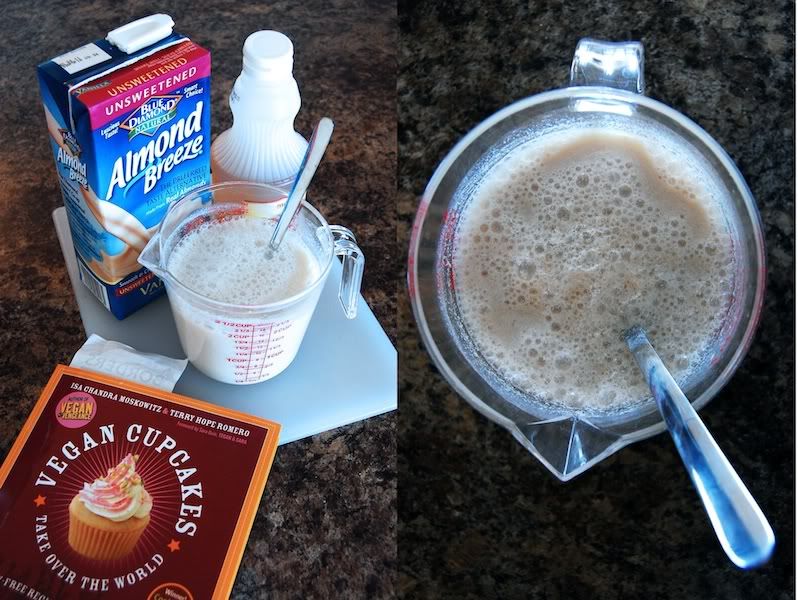
i have an awesome boss. part of her awesomeness stems from what a great gift-giver she is. for the holidays i got a gigantic set of sharpies, a three pack of the best-smelling antibacterial gel ever, and vegan cupcakes take over the world. oh i know, she rocks.

before receiving said gifts i had spoken at length with her in our tiny office about how i wanted to get into vegan baking, but was apprehensive about it as unknown baking territory. i've been taking baby steps via breads & cookies to build my confidence, but this weekend i decided that i was ready for the big leagues - cupcakes! - and armed myself with almond milk, vinegar, and earth balance.


i won't lie to you, i was nervous from the get-go, especially since the word "curdle" was in the first step. but, i took a deep breath and trusted the process and curdled it up. 


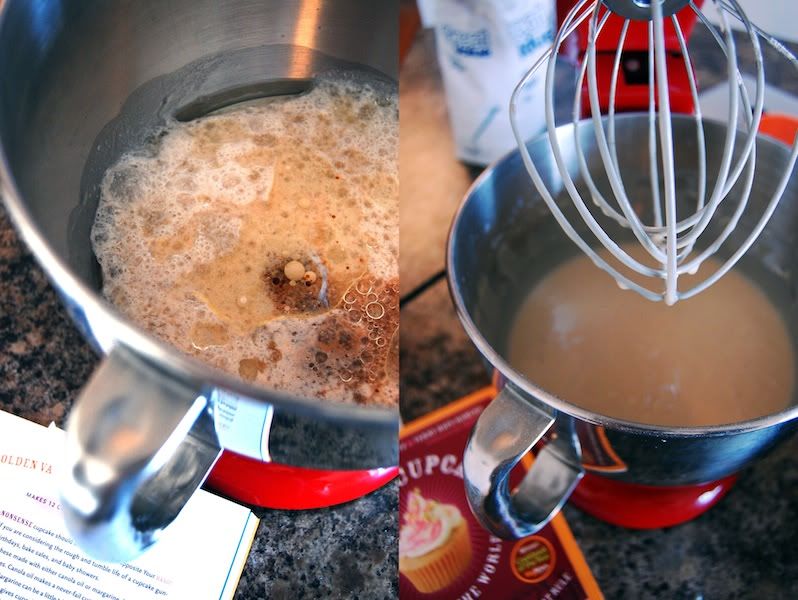
the batter was way more like a science fair project than a cupcake base. it was bubbly and reacting to itself and i'm pretty sure i could have made it explode if i had tossed a mentos in it. i started with my paddle attachment, but that was far too messy. i switched over to a whisk and it was way smoother sailing.

additional anxiety kicked in when i realized that the batter was an unpleasant khaki color instead of the golden-y goodness that i know and love, but through magic or science or oven gnomes that issue was resolved.


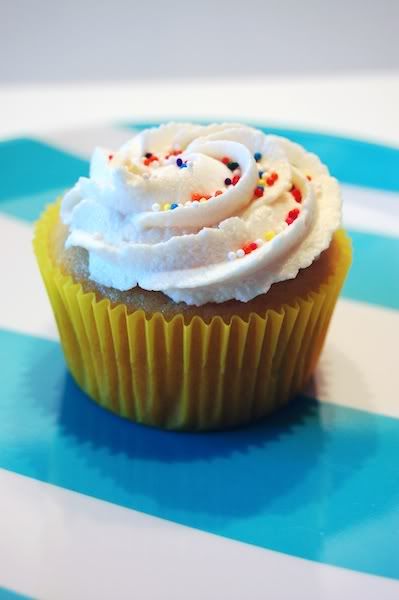
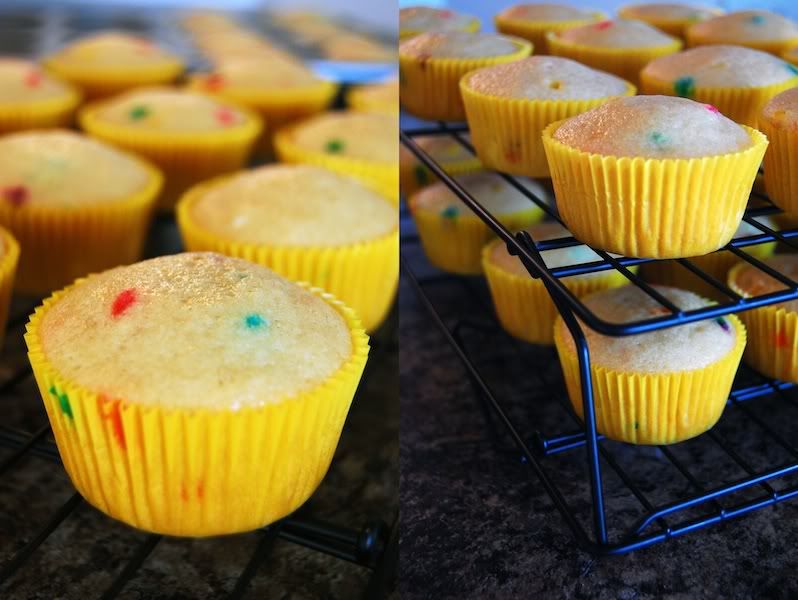
and i got beautiful, springy, perfectly-domed cupcakes! amazing.

by the way, if you bake at all and have limited counter space i highly, highly recommend investing in stackable cooling racks. hell, even if you have a giant kitchen there's no reason to waste space by having racks side-by-side. plus, then you can call each rack a "floor" and pretend that your cupcakes are in a fancy hotel. or not. cause that would be weird. anyway..


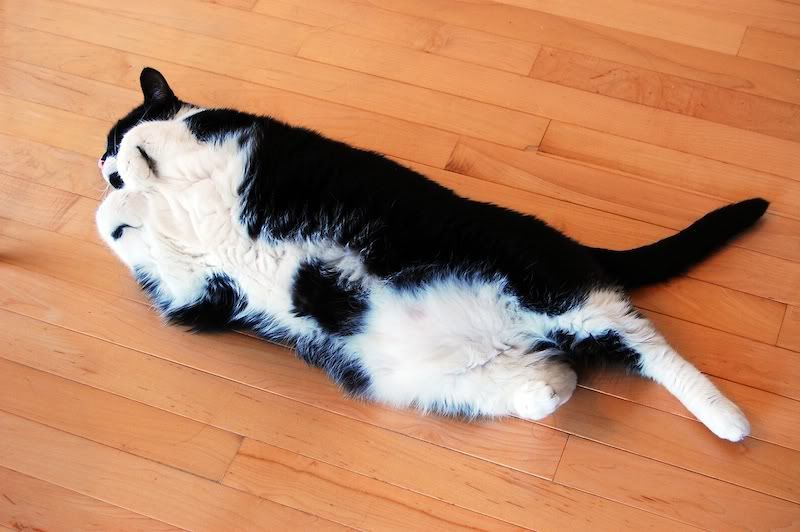
while the cupcakes cooled and i prepped the frosting everyone in my house decided it was nap time, including flapjack. he's 18 pounds. seriously. (not pictured: his sister, waffles).


in the end, the frosting is what got me. i'm pretty particular about my frostings and don't really have recipes, per se, but i have a general idea of what i want it to taste like and i adjust as i go. working with shortening and earth balance was a bit of a challenge for me and i think i need to do a little more research into how to achieve the perfect vegan buttercream.

i will say that it piped on pretty nicely and tasted a lot better once i let it set up in the fridge. i'm interested in if it will continue to improve with time, so i guess i'll have to force myself to eat one tomorrow. bummer.

overall, i'm pretty happy with how these came out, especially considering i'm a complete rookie. i would not have guessed they were vegan, which is my goal for animal-free baking, and was surprised at how delicious the batter was after it hung out in the oven for a while.

vegan funfetti cupcakes

adapted from vegan cupcakes take over the world
yields 28

ingredients:

2 cups almond milk (you could use soy, i've just been on an almond kick!)
2 teaspoons apple cider vinegar
2 1/2 cups all-purpose flour
4 tablespoons cornstarch
1 1/2 teaspoon baking powder
1 teaspoon baking soda
1 teaspoon salt
2/3 cup vegetable oil
1 1/2 cups granulated sugar
2 teaspoons vanilla extract
3 teaspoons almond extract

1. whisk milk & vinegar in a measuring cup and set aside so it gets nice & curdle-y

2. preheat oven to 350 degrees fahrenheit & line muffin pan

3. sift together the flour, cornstarch, baking powder, baking soda, and salt

4. with a whisk attachment or by hand, beat together soy milk mixture, oil, sugar, vanilla & almond extracts

5. add dry mixture to wet mixture and mix until no large clumps remain

6. carefully fold in 3-4 tablespoons sprinkles, medium-sized to large work best

7. fill up your lined pans two-thirds of the way (this is where an ice cream scoop comes in handy!) and bake for 18-20 minutes, or until a skewer comes out clean

8. let cool for 5-10 minutes in pan and then transfer to a cooling rack to cool completely

vegan buttercream frosting

(note: this is not a perfected recipe, so make sure to test your icing out as you go and adjust!)

ingredients:

1/3 cup non-hydrogenated shortening
1/3 non-hydrogenated margarine (i used earth balance)
3 cups sifted confectioner's sugar
up to 3 tablespoons almond milk
1 teaspoon vanilla extract
2 teaspoons almond extract
1/8-1/4 teaspoon salt (this sounds weird, i know, but i think it's essential in buttercreams)

1. beat together shortening & margarine until combined and fluffy

2. add sugar 1/2 cup at a time and mix

3. add extracts to taste

4. add salt to taste

5. if you need the icing to be less stiff, add milk a teaspoon at a time until it reaches the right consistency

6. decorate away!

nutritional information:


calories: 219, fat: 9.6g, cholesterol: 1mg, sodium: 162mg, carbs: 31.24g, sugars: 21g, protein: 1g.


as always, thank you for reading & happy baking!


amanda


ps: first of all, thank you for reading this far! secondly, if you end up making anything you've read here or have any suggestions i would love to hear from you! seriously, let's talk!

Copyright © 2013 Free Food Recipe 24 Hours™ is a registered trademark.

Designed by Templateism. Hosted on Blogger Platform.