Home Made Cupcake

Kamis, 29 September 2011

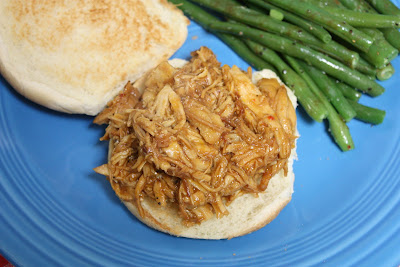
slow cooker chicken tacos

Posted By: Rynisma - 18.16
jason and i have very different weekday lunch habits. he goes out to lunch with the guys almost every day and refuses to eat the same lunch two days in a row. i am the complete opposite. i bring my lunch almost every day and regularly eat the same thing five days in a row (i've been known to eat the same lunch for weeks at a time). and because i tend to eat the same thing for at least five days in a row, i like lunches that are either quick and simple to assemble every day or something i can make once and eat all week.


i never ever get sick of tacos. i don't really know why. i didn't have them much as a kid and when we did, it wasn't anything special. but now, i can't get enough.

this is one of those "why didn't i think of that?!" recipes. so amazingly simple. i really don't take advantage of my slow cooker as much as i should. and now that i tackled chicken tacos, there must be a way to make carnitas and beef in it too.

consider yourself warned: this chicken is amazing, and the recipe makes a lot. i mean a lot. the sunday i made this, two of us had tacos for dinner. i ate tacos the rest of the week for lunch and at the end of the wek had at least half of the meat left. if you're cooking for a smaller crowd, like me, then i suggest freezing half for later.

slow cooker chicken tacos
adapted from beantown baker
6 hours, serves a lot (12+)

14.5 ounce can diced tomatoes
4 boneless skinless chicken breasts
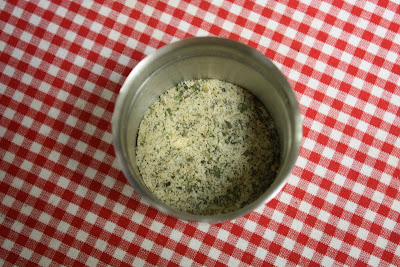
one packet taco seasoning or two tablespoons homemade taco seasoning
15 ounce low sodium chicken broth
taco fixings
  1. pour the diced tomatoes into the bottom of your slow cooker. spread the tomatoes around to make an even layer.
  2. lay the chicken breasts over the tomatoes.
  3. in a small bowl mix the taco seasoning and chicken stock. pour over the chicken.
  4. cover and turn the slow cooker on low. cook for about 6 hours, or until the chicken is cooked all the way through.
  5. remove the chicken from the slow cooker, leaving the liquid behind. shred the chicken with a fork. add liquid to the chicken, a tablespoon at a time, until the desired wetness.
  6. serve with your favorite taco fixings. freeze leftovers.
2012.03.05 this was alli 'n sons' pick for the secret recipe club!

    Senin, 26 September 2011

    knock off mongolian beef

    Posted By: Rynisma - 16.57
    if you hadn't realized, i was on vacation last week. we ate some really great food and some really horrible food - more on that later - and while i had great intentions of lining up posts before i left, vacation planning and preparing to be away from work for a week took over, leaving me with little time to post. which also means i have a week's worth of cooking and eating ready to share!


    the weekend after jason proposed to me - the weekend after thanksgiving 2008 to everyone else - our good friends took us out to dinner at pf chang's to celebrate. it wasn't a huge party, just a way to get together. and like always, we ordered the mongolian beef. two orders for the four of us. i don't know what it is about this stuff, but we go crazy for it. after licking our plates clean and passing on their sky high chocolate cake, i opened up my fortune cookie to the only legitimate and appropriate fortune i've ever received: a lifetime of happiness lies ahead of you. i've carried it in my wallet every day since.


    back to the beef. this beef is no joke. no joke to make - i dirtied a lot of pans and splattered oil all over my stove - and no joke to eat. it's freakin' amazing. and since the beef isn't the cheapest and it's fried, this is a once-a-year treat for us. completely and totally worth the mess, cost, and time.

    knock off mongolian beef
    adapted from food.com
    1 hour, makes 2 large servings

    the few times i have made this, i make one and a half times the original sauce amount so we have plenty to soak into our rice. if sauce isn't your thing, try 1/2 teaspoon ginger, 1 tablespoon garlic, 1/2 cup each soy sauce and water, and 3/4 cup brown sugar. and pf chang's doesn't serve theirs with snow peas, but i love them.

    1 pound flank steak
    1/4 cup cornstarch
    1 teaspoon fresh grated ginger
    1 1/2 tablespoons minced garlic
    3/4 cup soy sauce
    3/4 cup water
    1 cup + 2 tablespoons dark brown sugar
    about a cup of snow peas
    2 large green onions, thinly sliced
    vegetable oil
    1. prep the beef. slice the beef into quarter inch thick slices. toss the with cornstarch and set aside while making the sauce.
    2. make the sauce. heat 2 teaspoons of vegetable oil in a saucepan over medium low heat. add the ginger, garlic, soy sauce, and water to the pan. be sure to add the ingredients quickly as you don't want the garlic to burn. add the brown sugar and mix until dissolved. raise the heat to medium and boil the sauce for two to three minutes, or until thick. remove from heat.
    3. heat one cup vegetable oil in a wok over medium heat until shimmering. add about half of the beef to the oil and cook about two minutes, or until the edges are brown. remove from the pan and repeat with the remaining beef. 
    4. remove any remaining oil from the wok. return the beef to the pan and cook an additional minute or two until cooked through. add the sauce and snow peas and cook for a minute until heated through. 
    5. toss the green onions with the meat. cook an additional minute. serve with rice.

    Minggu, 25 September 2011

    Garlic Butter Dips

    Posted By: Rynisma - 22.02
    These breadsticks are very easy to make and very yummy with a light garlic flavor. They go with pretty much anything too! The original recipe is from The Recipe Hall of Fame Cookbook and has been slightly altered by me. I made them for the first time when I was 16! They didn't turn out great that first time because I'd never made bread or biscuits before and I overworked the dough, but once you get the method down, they couldn't be better or simpler. We actually have them much more frequently than garlic bread because French bread only stays good for a day or so and I don't want to make a trip to the store just to get a loaf of bread, plus they reheat quite well and last in the fridge for a few days. I should also mention that they aren't like your average breadstick because they're like biscuits rather than a yeast bread, but they sure are good :) I will share my recipe for yeast breadsticks another time.

    Quick Note:  I tried these with whole wheat flour once and they turned out great!  The texture and whole wheat flavor were very good.

    Here's a picture of the breadsticks from the top and bottom. The bottoms get a little crunchy.


    Garlic Butter Dips


    1/3 C butter
    1 clove garlic, minced
    2 C flour
    1 T sugar
    1 1/2 t salt
    3 1/2 t baking powder
    3/4 C milk

    Put the butter in the center of a 9 by 13 baking dish and place the garlic on top. Set the dish in the oven and set to 350 degrees so the butter can melt while you make the dough. Be sure to remove the dish from the oven if you aren't finished with the dough by the time the butter melts! In a medium mixing bowl, stir together dry ingredients, then stir in just enough milk to form a dough. Start with 3/4 cup and add more a tablespoon at a time if necessary. You can use your hands to finish mixing up the dough, but be careful not to overwork it and don't knead it at all. Flour a large piece of waxed paper, place the dough in the center, and sprinkle with a little more flour. Roll out into a 1/2 inch thick approximately 8 by 10 inch rectangle. Cut dough down the center lengthwise and then into 1 inch strips to make 20 breadsticks. When butter is melted in the dish, remove from the oven and spread the garlic around with a spoon. Carefully press each bread stick into the melted butter on both sides and arrange in the dish. Bake until golden, about 15 minutes.

    Yield: 20 breadsticks

    Easy Baked Shells

    Posted By: Rynisma - 04.06
    16 posts so far and none of them have used cheese and noodles! The wait is finally over. It isn't mac and cheese but is almost as good: stuffed shells! My husband loves lasagna almost as much as he loves me and I knew something lasagna-y would help make him feel better since he still has that darned cold. This is a recipe I whipped up and we both think it turned out incredibly well. The dude said it was as good as his beloved lasagna and ate two servings. The great thing is that it's easier to make than lasagna and easier to serve since there aren't any layers to reckon with. I promise the noodles will cook through in the oven! Two important notes: The shells are only going to be as good as your spaghetti sauce. I used this recipe because I had a bunch in my freezer and it's really good. Your results will be best if you use a sauce that you love! I also used my own garlic bread seasoning in the recipe, it may be too salty if you use seasoning that you purchased.


    Easy Baked Shells

    5 C spaghetti sauce
    1 C water
    1/2 t salt
    10 oz package frozen chopped spinach, thawed
    15 oz container ricotta cheese (I used part skim)
    2 C grated mozzarella, divided
    1 egg
    2 T garlic bread seasoning, plus more to sprinkle
    1/2 t pepper
    1/8 t ground nutmeg
    30 jumbo pasta shells, uncooked (about 2/3 of a 12 oz package)
    dried parsley to sprinkle

    Preheat oven to 350 and grease a 9 by 13 baking dish. Stir together the spaghetti sauce, water and salt. Spread about 1 cup in the bottom of the baking dish and set the rest aside. Squeeze the thawed spinach to get out as much moisture as possible and place in a medium mixing bowl. Add ricotta, 1 cup of the mozzarella, the egg, garlic bread seasoning, pepper and nutmeg and stir well to combine. Spoon about 1 tablespoon into each shell and place them as close together as possible in the baking dish. Top with the remaining spaghetti sauce, making sure that each shell is covered. Cover the baking dish tightly with aluminum foil and bake in the preheated oven for 1 hour or until the shells are tender when poked with a fork. Sprinkle with the remaining mozzarella, a little extra garlic bread seasoning, and a bit of dried parsley. Return to oven to allow cheese to melt.

    Yield: about 8 servings

    Garlic Bread Seasoning

    Posted By: Rynisma - 03.44
    This recipe is my version of the recipe from Our Best Bites, one of my favorite cooking blogs. As usual, I tweaked it a bit to suit our preferences. The dude thought it had too much oregano and I noticed it was missing rosemary, which to my rosemary loving tastebuds was a grievous flaw that could not go uncorrected. Every couple of months I make up a new batch and store it in a little shaker jar in the fridge. The name is kind of misleading because I sprinkle it on pizza, pasta, breadsticks, and anything else that seems like it could use a boost. Only rarely is it actually used for garlic bread! It does make great garlic bread though :o) Even if you usually turn your nose up at Kraft parmesan in a can- the first time I bought it was for this recipe- please give it a shot! Also I could see this being a great little gift to give around Christmas if you put it in a cute jar.


    Garlic Bread Seasoning

    4 T powdered parmesan cheese (the kind in the can)
    1 T garlic powder
    1 t salt
    1 t dried basil
    1 t dried parsley
    1/2 t dried oregano
    1/2 t dried rosemary
    1/2 t black pepper

    Place everything in an 8 oz jar and shake to mix. Store in the fridge. Sprinkle on pizza, pasta, breadsticks, or make garlic bread with it.

    To make garlic bread, buy a long loaf of French bred and mix 1 1/2 T of the seasoning with 1/3 C softened butter. Use a serrated knife to make a cut from above almost all the way through the bread every 3/4 inch down the length of the loaf. Spread the garlic butter on one side of each slice, press the slices together, then wrap the whole thing in aluminum foil. Bake at 350 for about 15 minutes or until bread is heated through and lightly crisp on the outside. Sorry, no picture, but I'll add one next time I make it!

    Slow Cooker Spaghetti Sauce

    Posted By: Rynisma - 03.13
    Looking over the recipes I've posted so far, I sure do use my slow cooker a lot, don't I?! I can't help it, it's so convenient. This is the one I have. One of the reasons I love it is that it has 3 size crocks: 2 quart, 4 quart and 6 quart. You need to use the right sized crock for what you're making or it won't cook right, so this is extremely convenient. You can even pair together the big crock and the smallest one to make a water bath for cooking oatmeal overnight. I first saw it at Wal Mart a couple years ago but couldn't justify buying it because the one I had still worked. When that one bit the dust I practically squealed with joy :oD

    I pretty much only use the big 6 quart crock for three things: chili, apple butter, and this spaghetti sauce. Every once in a while I make huge vats of chili and spaghetti sauce and then freeze it for later. We haven't purchased a jar of spaghetti sauce since I started doing it this way! I do like Prego, but I'm pretty sure that's only because it's what my dad always used when I was growing up. The other brands don't do it for me. Regardless, my homemade spaghetti sauce is definitely better. It is the thick, hearty, delicious result of much experimentation with cooking spaghetti sauce and I'm happy to say I created the recipe. It happens to be vegetarian and can be easily made vegan if you leave out the butter. Even if you're a meat lover I don't think you'll be disappointed. And don't fear the carrots! They get chopped up pretty small in the food processor and add texture and a bit of sweetness, but you can't even really see them when the sauce is done cooking.

    Quick note: I buy store brand of most things, but to me there's a huge difference between store brand canned tomatoes and good quality ones. I use DeLallo canned tomatoes for this, which are very flavorful and don't need any added salt. You can use whatever brand you want but you may need to add salt to the sauce if you use another brand.


    Slow Cooker Spaghetti Sauce

    1/2 bunch fresh parsley, stems removed (can use the whole bunch)
    1/2 lb carrots, peeled and chopped roughly
    1 large onion, peeled and chopped roughly
    6 cloves garlic, peeled
    3 28 oz cans crushed tomatoes
    1 28 oz can tomato sauce
    2 12 oz cans tomato paste
    1 1/2 C red wine
    2 T brown sugar
    3 1/2 t dried basil
    2 1/2 t dried oregano
    1 1/2 t dried thyme
    1 1/2 t dried rosemary
    1 t pepper
    salt to taste (optional)
    1 stick butter (optional)

    Mince the parsley in a food processor, then the carrots, then the onion and garlic. Add to the crock of a 6 quart slow cooker. Add remaining ingredients except the butter and salt and stir well to combine. Cover and turn heat to high until the sauce comes to a boil, about 1 hour. Remove lid and cover with a splatter screen. This step is important if you don't want little orange dots on everything in a 6 foot radius! Cook the sauce for 5 more hours, stirring occasionally. Veggies should be tender and sauce should be rich and thick. Stir in butter and salt if desired.

    Yield: 24 servings. Freeze some!

    Sabtu, 24 September 2011

    Chicken Noodle Soup

    Posted By: Rynisma - 00.23
    My poor husband is miserable with a cold so he requested chicken noodle soup for dinner. Normally I would do this completely from scratch with a whole chicken, but there are two problems with that. First of all, if I make broth from a chicken, I always do it the day before I need it because I like to refrigerate the broth and remove the thick layer of fat that rises to the surface. He wanted soup NOW! I could try to just skim the fat off, but that leads us to the second problem. He hates the smell of whole chickens being boiled because he says it's like being punched in the face by a chicken. Usually you can't smell when you have a cold but his sniffing abilities are intact. He also loves dark meat so I decided to use boneless, skinless chicken thighs for the meat portion since they cook fast and Knorr chicken bouillon cubes for the broth part. I know, I know. Most bouillon is gross, but I do like Knorr. At my grocery store it's in the Hispanic food section for some reason. This is what it looks like:


    You could use concentrated chicken soup base or cartons if chicken broth if you prefer. I don't like the cartons because I think it's overpriced, bland and a waste of packaging.

    I would also normally put veggies in it like onions and carrots- yum!- but he didn't want those either. I guess when you're sick your preferences revert to what you liked (or didn't like) when you were a little kid! So I just added a halved onion and whole garlic cloves to season the soup as the chicken cooked since they can be easily strained out. This Joseph Joseph scoop colander was a gift from my mom and it's perfect for the job:


    Here's the result, mostly homemade chicken noodle soup that's sure to please picky people! Sorry the picture is unappetizing, I promise it's good though :)


    Chicken Noodle Soup

    For soup:
    1 large onion
    4 whole cloves peeled garlic
    1 lb boneless skinless chicken thighs or breasts
    1/2 gallon chicken broth
    1/2 t dried sage
    1/4 t dried rosemary
    1/4 t dried marjoram
    1/4 t pepper
    salt to taste

    For noodles:
    2 1/2 C flour plus more for dusting
    1/2 t salt
    2 eggs
    1 T softened butter
    at least 1/3 C water

    Cut the ends off the onion, chop in half, and remove skin. Place in 5 quart pot along with the garlic, chicken and broth (note: if you use bouillon, just add 1/2 gallon water and the bouillon cubes). Crush herbs with a mortar and pestle and add to the pot along with the pepper. Cover pot and bring to a boil, then reduce heat to medium and simmer 20 minutes or until the chicken is cooked through. Make the noodles while the chicken is simmering.

    To make noodles:

    In the bowl of a stand mixer, stir together flour and salt. Add eggs, butter and 1/3 cup water. Stir by hand until the ingredients are mostly combined, then attach the dough hook and let the mixer do the work. Add more water, a tablespoon at a time, if dough is too dry. You don't want it to be sticky though. Let mixer knead dough for 5 minutes until smooth (or do this by hand if you don't have a stand mixer), then form the dough into a ball and cover the mixing bowl. Let rest 10 minutes. After dough has rested, generously flour a clean surface. Place the dough on the surface, sprinkle with additional flour, and roll dough out until it's 1/4 inch thick if you like fat noodles (we do!) or 1/8 inch thick if you want thinner noodles. Use a pizza cutter to slice dough into 1/2 inch by 1 inch pieces.

    By this time the chicken should be done cooking. Remove the chicken, onions and garlic with a large slotted spoon. Discard the veggies and dice the chicken. Taste the broth and add salt if necessary. When you're ready to cook the noodles, bring the broth back to a light boil and add them along with the chicken. Simmer, uncovered, 5 minutes.

    Yield: 6-8 servings

    Kamis, 22 September 2011

    Canadian Honey Drop Cookies

    Posted By: Rynisma - 23.13
    Today I did what ended up being a cookie experiment. A bit of backstory first. Has anyone heard of the Betty Crocker Cooky Book? It came out in 1963 and was apparently such a hit that they reprinted exact copies of it a few years ago. It has great reviews on Amazon.com, which is where I saw the book. So many people had wonderful things to say about the book, I love old cook books, and I love cookies, so of course it piqued my interest. My dear cousin got married a couple of years ago and I gave the book to her for Christmas that first year. I'm pretty sentimental and imagined her and her husband and future kids happening upon favorite cookie recipes that they'd make together year after year. What could be happier than that? I love cook books but have a tendency to only make one or two from any given book. Because of this, I've decided to make one cookie recipe from the Cooky Book every month so I can familiarize myself with some of the recipes and hopefully find some favorites :o)

    Anyway, I got my own copy of the Cooky Book recently and spent a couple of days looking through it, marking recipes I want to try and trying to pick one to make now. Let me tell you, it is HARD to pick one recipe from a book that has nearly 500! It's also interesting to see how cookie recipes have changed over time. Most of the recipes seem to have coconut, nuts, or some variety of dried fruit in them, and there were a few recipes specifically categorized as being "bland." Way to appeal to the audience, eh? Also there were only a couple of recipes for chocolate chip cookies but about fifteen for rolled sugar cookies. I guess maybe chocolate chip cookies have gained more popularity in the past 50 years!

    Back to the point: In the end I settled on a recipe called Canadian Honey Drops. I don't get why they're Canadian and they aren't drop cookies, but the ingredients sounded delicious. Brown sugar? Check! Honey? Double check! Sandwich the baked cookies together with jam? Ooooh yeah! We have lots of wonderful homemade raspberry and currant jelly from my mother-in-law's friend. Sounded like a recipe worth trying to me!

    Making the dough went great. It was quick to mix up and so easy to handle. Tasted good too :o) The recipe said to refrigerate the dough for several hours or overnight. I went ahead and chilled it 2 hours but I don't think it was necessary since the cookies barely spread. They actually spread so little that I had to alter the recipe because the first cookies to emerge from the oven were almost an inch thick, as you can see:


    Tasty (and not biscuity in spite of their appearance), but not exactly conducive to being made into cookie sandwiches. So I squashed the rest of the dough balls before baking them. Worked like a charm:


    I did a few other tiny alterations and experiments that aren't worth mentioning except one, which was with the filling. The recipe said to just spread jam or jelly on the cookies but growing up I had many a school lunch PBJ go soggy from the jelly and didn't want my cookies to suffer the same fate. To fix this, I simmered raspberry jelly in a saucepan until it thickened up and spread that on the cookies instead.

    After all this fiddling, the cookies turned out great. Rather plain to look at, but delicious. The cookie part is very soft and tender and not too sweet with a wonderful, delicate honey vanilla flavor. The jelly in the center is of course quite sweet and flavorful but doesn't overpower the cookie. The big fat biscuit looking cookies are good too, even without jelly. Definitely a winner in my book!

    Here is the altered recipe for your baking pleasure:

    Canadian Honey Drops

    1 C shortening
    1 C packed brown sugar
    2 eggs
    1/3 C honey
    1 t vanilla
    3 1/2 C flour
    2 t baking soda
    1 C jelly of choice (I used raspberry)

    To make cookies: Cream together shortening, brown sugar and eggs. Add honey and vanilla and mix until fluffy. Combine flour and baking soda in a separate bowl, then stir into sugar mixture until well combined. Cover bowl and refrigerate dough 2 hours (not sure if this step is necessary). Preheat oven to 350 and line cookie sheets with parchment paper. Roll dough into 1 inch balls, place on the cookie sheets 3 inches apart, and squish with the heel of your hand or the bottom of a glass until cookies are about 1/4 inch high. Bake 8 to 10 minutes or until cookies are lightly browned. Let cool.

    To make filling: Bring 1 C jelly to a light boil in a small saucepan over medium heat and simmer 4 minutes, stirring constantly. Remove from heat, let cool 2 minutes, and spread over half of the cookies. Top with the remaining cookies.

    Yield: about 12 good sized cookie sandwiches

    Selasa, 20 September 2011

    Spiced Orange Tea Mix

    Posted By: Rynisma - 21.26
    There are many versions of this drink mix. Sometimes it's called Friendship Tea or Russian Tea but I'm more to the point and prefer Spiced Orange Tea. I first saw a version of it on the back of a Tang canister but I've also seen it in cook books and online. Whatever you want to call it, it's wonderful! I was hooked the first time I made it a few years ago and I've made it every winter since because it's so good and always puts me in a good mood. Mostly it tastes citrusy but you can taste the spices and tea too. It's pretty unique and definitely worth trying if you've never had it before. If ya don't like it, you can always give it to a friend or bring it to work to share with your coworkers. And if you DO like it, you can make a double batch, package it in cute little canning jars, and give it away as little gifts at Christmas!

    Usually I wait to mix it up until we have snow on the ground (which will probably be about 2 weeks from now!), but my husband has a bad sore throat today and this tea is soothing. And anyway, we've been having gorgeous fall weather here in Fairbanks the past few days. Brilliant blue skies, not too chilly, lovely turning leaves. Usually we seem to rush from summer to winter over the period of a couple days so I'm enjoying the beautiful autumn. Everyone seems to be enjoying the weather. We were at the very last day of the farmer's market this past Saturday and little kids were running around having a ton of fun playing in the leaves. We watched one little girl dumping leaves on her mom's head over and over. She was so cute and it was hilarious :D Then today a young boy in our neighborhood stopped me and asked if he wanted me to rake the leaves in our yard. He said he made $25 so far and was just so pleased with himself! Love it! And Spiced Orange Tea is perfect for this kind of weather :)

    Okay, enough yammering. Here's the recipe:


    Spiced Orange Tea Mix

    1 1/2 C sugar
    1 C Tang
    1/2 C instant tea powder
    1 .23 oz packet lemonade Kool-Aid mix
    1 t cinnamon
    1/4 t allspice
    Place all ingredients into a jar, put on the lid, and shake to mix. To serve, mix desired amount (about .5-1 T) with hot water in a mug and stir to dissolve. Store in an airtight jar or else the mix will clump up and be sure to shake up the jar each time you want some tea because it tends to settle.

    Yield: 3 cups, about 50-100 mugs depending on how strong you like it.

    Here's a mug of the tea that I mixed up for my husband. The mug features a panel from an Alaskan comic strip called Tundra. The artist is named Chad Carpenter and he sells books, calendars, shirts, and obviously mugs. We see him at the Tanana Valley State Fair every year and usually buy a calendar or another book and my parents (who do not live in Alaska) have received Tundra gifts on more than one occasion. Here's the Tundra website if you would like to have a couple laughs.

    Senin, 19 September 2011

    Slow Cooker Pinto Beans

    Posted By: Rynisma - 22.40
    We eat a lot of beans, probably more than most people. Refried beans, red and white chili with beans (and often no meat), beans added to other recipes, and these slow cooked pinto beans. Pinto beans are one of the most basic (and inexpensive) things I cook but I really love them. The flavor is not very exciting really but very satisfying and I'm always happy when we're having them! If you haven't made them before, you really should. You can always jazz them up with hot sauce or whatever you want at the end if you think they're boring. At Sam's Club this weekend we bought a 10 pound bag of dried pinto beans and I put up a bunch of cut up ham in the freezer so I'll get to enjoy them pretty frequently :D

    When you cook pinto beans like this, the most important thing is to include some kind of meat like ham, ham hocks or a ham bone. I've never bought ham hocks (don't think our store even has them) and never have big ham bones so that leaves me with using just ham. For each pound of dry beans I use half a pound of ham and cut it into big hunks. I feel that meat is optional in a lot of recipes, but not in these beans because most of the flavor comes from it. If you left out the ham, all you'd have is oniony salty beans which would be even plainer! The ham gets really tender and the flavor changes a bit as it cooks. I know it looks weird and dark in the picture but I promise the ham is good :)  If you cook a ham, just stick some in the freezer to use for beans.

    This is also the basic method for cooking any kind of dried beans, but only use the beans and water. Sometimes I cook garbanzos in the slow cooker for hummus or other beans to go in other recipes. In my opinion, using a slow cooker is really the only way to cook beans. No standing around stirring, no beans cooking to the bottom of the pot, nothing! It's so easy!

    Without further ado...


    Slow Cooker Pinto Beans

    1 lb dried pinto beans
    4 C water
    4 to 8 oz ham, cut into chunks, or a ham hock
    1 C diced onions (I had to use 2 T dried onions because it's all I had)
    1/2 T salt
    1/2 t pepper

    Pour beans into 4 quart slow cooker. As you pour, look them over and pick out any weird looking ones or small rocks. Fill crock with a couple quarts of water, cover, and leave them to sit 8 hours or over night. In the morning, drain off the excess liquid and then rinse and drain them a couple of times. I don't bother using a strainer for this, just use the slow cooker's lid to keep the beans in the crock as you pour out the water.

    Add the 4 C water to the beans along with the ham, diced onions, salt and pepper. Cover and let them cook on low for about 8 hours or on high about 4 hours, until beans are tender. The time will depend on your slow cooker. Great served with cornbread and salad.

    Yield: 6 servings

    Minggu, 18 September 2011

    Rosemary Roasted Carrots

    Posted By: Rynisma - 23.59
    I love these carrots! They are delicious, healthy, and so easy to make. One of the best things about them is that you don't need to wash a bowl or the baking dish because you mix it all up right on the foil lined pan. They're one of the first real things I cooked (other than boxed mac and cheese or spaghetti) when I was about 13. Fast forward a few years and when I was 16, it was my responsibility to make Christmas dinner for my family. I made a baked ham, baked apples, corn pudding, scalloped potatoes and these carrots. My dad announced that we needed to go visit someone when the carrots were already in the oven so I just lowered the temperature before we left. When we got home an hour and a half or so later, the carrots were VERY shriveled but know what? They still tasted great!

    Note: You can make them with dried dill if you'd like or experiment with other herbs but rosemary is my favorite herb so it's the one I usually choose. Before you sprinkle on the rosemary, crush it with a mortar and pestle or just rub it between your palms a few times to release the flavor. I also think kosher salt and freshly cracked pepper taste the best on them but you can use what you have.


    Rosemary Roasted Carrots

    1 lb bag of baby carrots, minus 1 for each of your pet bunnies
    1 T olive oil
    3/4 t salt
    1/4 t dried rosemary
    1/8 t pepper

    Preheat oven to 400 and line a small metal baking sheet with foil, shiny side up. Drain off excess water from bag of carrots and empty onto baking sheet. Dab with paper towel to absorb some of the moisture. Drizzle with the olive oil and seasonings, then use your hand to mix everything up. Arrange the carrots evenly over the baking sheet and bake about 30 minutes or until they're as tender as you'd like.

    Yield: 4 servings

    trifecta cookies

    Posted By: Rynisma - 19.48
    i'm a sucker for a good cookie. aren't you? peanut butter, chocolate chip, oatmeal. i'll take them all. and lucky for me, this cookie has all three rolled into one!

    i made a batch of these the day before i left on a four hour drive with a carload of women. 55, 50, 29, and 19 year old women to be exact. surprisingly, no one ate a cookie until midafternoon. when it was pouring rain and we stopped at a gas station. three of us waited in the car while one ran in. it was that exact moment when my mother said "hmm, ok, i'll take one of those cookies now." perfect timing. the three of us devoured eight in the next two minutes.


    trifecta cookies
    get the recipe at the novice chef
    makes 2 dozen cookies

    note: the dough must sit in the refrigerator overnight, so plan ahead! and jessica's rendition of the recipe is perfect, so why change it?

    2013.02.04 this is Barbara Bakes' pick for the secret recipe club!

    Sabtu, 17 September 2011

    Easy Chicken Cordon Bleu

    Posted By: Rynisma - 00.52
    Every week when I'm planning what to cook for the next week, I ask my husband what he'd like me to make. By now I should know better because about 50% of the time he has no particular requests and the other half of the time he asks for casserole (his eyes actually light up at the mention of tuna casserole). This week when I asked though he requested something: chicken cordon bleu! So of course I was happy to make it for him. He loves chicken cordon bleu and used to buy frozen ones all the time before we lived together.

    I debated between making real chicken cordon bleu and making this version, which I've made before. He picked this one, so here we go! It really is delicious, especially the sauce. I'm not very fond of condensed cream of ___ soups (and will soon share a recipe for a cream soup mix) but I already had a can in the pantry. It actually works great here with the help of the sour cream and wine. A couple of quick notes: first, check the weight of your chicken breasts. Mine were each 3/4 of a pound after being cleaned, holy moly! I cut them in half. Also, I baked mine in my big round baking dish this time but it turns out better in a 9 by 13 so disregard the shape of the dish in the picture :)


    Easy Chicken Cordon Bleu

    6 boneless skinless chicken breast halves (totaling 1.5-2 pounds), cleaned
    6 slices ham
    6 slices swiss cheese
    1 can cream of chicken soup
    1 C sour cream
    1/4 C white wine
    1/2 t salt
    1 t pepper
    1 t garlic powder
    1 t parsley

    Preheat oven to 350 and grease a 9 by 13 dish. Arrange chicken breasts in dish and top each with a slice of ham and cheese. Stir together remaining ingredients and spread over chicken. Bake 45-60 minutes or until a thermometer inserted into the chicken reaches 165 degrees. Serve over egg noodles, rice or mashed potatoes.

    Yield: 6 servings

    Jumat, 16 September 2011

    Margie Beans

    Posted By: Rynisma - 00.38
    I apologize for posting something so basic and am only doing it because they taste so good and are a family favorite. They're perfectly cooked: tender but still with a little crunch. My Grandma Margie only ever made green beans this way so they earned the name Margie Beans. Grandma Margie was raised primarily in the Pacific Northwest while my other grandmother lived in Kentucky her entire life. The two women's cooking styles reflected where they were from and I'm pretty sure my Kentucky grandmother only ever served green beans that were cooked to death with bacon (which are admittedly tasty, too). When I was a little kid, the Kentucky grandparents came to visit us and my mother made Margie Beans- the beans she'd grown up with- to go with dinner. My grandfather wasn't accustomed to beans prepared this way and apparently didn't eat a single one, a fact that did not go unnoticed by a bean loving 4 year old me who kept asking him why he wasn't eating them! Sorry for putting you on the spot, Grandfather! I promise my etiquette skills have improved since then.


    Margie Beans

    3/4 lb fresh green beans, rinsed and ends snipped off with scissors
    2 T butter
    salt and freshly cracked pepper to taste

    Bring 3 quarts of water to a boil in a pot. Add green beans and let boil for exactly 3 minutes (set your timer). Drain and toss with butter, then season with salt and pepper to taste.

    Yield: 4 servings

    Slow Cooker Shredded BBQ Chicken

    Posted By: Rynisma - 00.31
    I ran across the recipe for Zesty Slow Cooker Chicken Barbecue on Allrecipes about a month ago and had to try it. It looked so easy to make and had great reviews (all 2,281 of them!). I was not disappointed. A lot of the flavor of course came from the barbecue sauce. We chose Sweet Baby Ray's Sweet 'n Spicy sauce which proved to be a fine choice and resulted in saucy, sweet, zippy, ever so slightly spicy chicken. It made so much that we ate it for 3 nights and then I froze the rest for later. Perfect to pull out of the freezer on a day like today when I was gone at school for 9 hours.

    We've only had it on buns so far but I think it would be tasty on pizza. My first ever job was at Papa Murphy's and they used to have a BBQ chicken pizza that was made by stirring together diced chicken with barbecue sauce, spreading it on the crust, and topping with cheese, green onions, olives and a couple other things. Sounds good! In any case, I will definitely make this again in the future since it's beyond simple to make, really yummy, and makes a ton.


    Slow Cooker Shredded BBQ Chicken
    2 1/2 lbs boneless skinless chicken breasts, cleaned
    18 oz bottle of your favorite BBQ sauce
    3/4 C Italian dressing
    1/3 C packed brown sugar
    3 T Worcestershire sauce

    In a 4 quart crock, stir together everything but the chicken. Add the chicken and turn to coat with sauce. Cook on low until chicken breasts are no longer pink in the middle. This will depend on how hot your slow cooker cooks. Mine was done in just 3 1/2 hours! When the chicken is cooked, shred it with 2 forks right in the crock. It isn't going to look pretty- the chicken is going to be stained orange and the sauce will be really thin and you may be doubting things, but keep going! Turn the temperature to high and let it all cook uncovered for about an hour to let some of the excess liquid cook off, being sure to stir every 10-15 minutes so nothing burns. Serve on toasted hamburger buns.

    Yield: Enough for about 12 sandwiches. Freeze some for later!

    Kamis, 15 September 2011

    The Perfect Hard Boiled Egg

    Posted By: Rynisma - 21.05

    Okay, so this is a method more than a recipe. I'm posting it though because I've noticed lots of people have problems boiling eggs perfectly so that they're cooked through all the way with no green and the shells come off without mangling the egg. Over the years, I've learned a number of little tricks and I'd love to share them with you. Here are the most important ones with explanations:

    1) Do not use fresh eggs! Even this method will be difficult with them. You want eggs that have been in your refrigerator for a couple of weeks as they're much more willing to part with their shells. The eggs I used this time have an expiration date 3 days away.

    2) Use a big pot. My pot holds 5 quarts. You want a big pot because you're going to rely on the heat from all that water to continue cooking the eggs after you turn off the heat. Fill the pot to within a couple inches of the top even if you're only going to boil a few eggs.

    3) Salt the water liberally. I use 2 whole tablespoons of salt for my 5 quart pot, regardless of how many eggs I'm cooking. It doesn't make the eggs taste salty (at least not that I can tell) but it does something magical that helps keep the shells from sticking.

    Okay, on to the actual method!

    The Perfect Hard Boiled Egg

    Place desired number of eggs in a 5 quart pot. Cover with cool water to within 2 inches of the rim (or just use about a gallon of water if you have a bigger pot). Add 2 tablespoons of salt. Cover the pot and cook on high heat until the water boils rapidly. Let it boil for 1 minute, then turn off the heat. DO NOT remove the pot from the burner, just turn off the heat. Set your timer for exactly 20 minutes and go find something to do.

    When the timer goes off, drain the water off of the eggs and refill the pot with cold water. Let the eggs sit in the cold water for 5 minutes or so. If you need the eggs ASAP, you can drain this water off and refill with cold water and let them sit again. When they're as cool as you need, drain off all of the water. Cover with the lid and vigorously shake the pot up and down and around and around a few times while holding the lid down with your thumbs. After you do this, some of your egg shells will have probably slipped completely off. This is how mine looked:


    Only 2 or 3 eggs still have shells! Those ones will probably slide off really easily, but even if they don't, the shells should still be cracked all over. Cover the eggs with cold water and let them sit for about 5 minutes so the water can seep into the cracks. By this time, you should be able to pull the shells off very easily with your hands. Rinse the eggs after taking the shells off and then store 'em in the fridge to use in any number of deliciously eggy recipes or just to munch on plain.

    I hope my method works well for you too! It's always worked for me :)

    peach gelee

    Posted By: Rynisma - 19.29
    these are not my mother's orange slices.

    my mother loves orange slices. those sickeningly sweet, coated in sugar, chewy candies that look like cartoon orange slices. not every time, but most times, we went to the grocery store, my mom would buy a small bag of these. and she always opened them as soon as she got in the car, passing the bag around to my sister and i until our teeth couldn't take it. then they would end up closed with a clothes pin, stashed in the candy cupboard at home. i don't know what it was about those things, but mom loved them.


    mom's orange slices are sickeningly sweet and stick to your teeth chewy. while these peach candies are definitely sweet - it is candy  after all - it isn't sickening. and you don't have to worry about fillings falling out or getting them stuck in your braces (which i always did with those darn orange slices) since these are nice and chewy without being sticky. they're a nice bite of sweet, concentrated peach flavor. a great afternoon pick me up.

    got some end of the summer peaches? or like me - have one lonely last jar of peaches left that you canned last year and need to make room for this year's crop? this is it. well, let's be honest, this or two of my other favorites - jam and ice cream.

    peach gelee
    adapted from food wishes
    40 minutes, plus cooling & cutting time, makes 18 one inch square candies

    1 pound ripe peaches, pitted, peeled, and cut into chunks
    1 tablespoon fresh lime juice
    3 ounces liquid pectin
    2 cups sugar
    additional sugar for cutting the candy
    1. in a blender or food processor, puree the peaches and lime juice until smooth.
    2. add the peach puree and 1/2 cup of sugar to a deep sauce pan. bring to a boil and boil lightly while stirring frequently for about fifteen minutes, until thick.
    3. line an 8x8 or 9x9 pan with plastic wrap and set aside.
    4. add the remaining 1 1/2 cups sugar and the liquid pectin. stirring constantly, heat the mixture to 200F and cook at 200F for an additional 10 to 15 minutes. be sure to stir constantly and if the bottom starts to scorch or burn, lower the heat a bit and stir faster. the mixture will be really thick when ready.
    5. pour the peach mixture into the plastic wrap lined pan. let cool completely, cover with plastic wrap, and let sit a couple hours or overnight until set.
    6. when you're ready to cut the candy, coat the top with granulated sugar (it's really sticky). turn the candy out of the pan and unpeel from the plastic wrap. cover the new top (which was the bottom in the pan) with granulated sugar. use a chef's knife to cut into whatever shapes and sizes you want. toss the finished candy pieces with sugar to coat. store in the refrigerator.

    Rabu, 14 September 2011

    Dilly Dip

    Posted By: Rynisma - 19.34
    Have you ever had Beau Monde seasoning? I'd heard of it and was intrigued by it, but never had it until the grocery store had a huge sale on Spice Island brand herbs and spices a year ago. We came home with about 15 jars of spices that day as I'd just got a spice rack and needed some new spices. One of the ones we brought home was Beau Monde. It is a very savory blend of salt, celery and onion. Neither of us are wild about celery (my husband outright detests it) but this unassuming sounding blend actually tastes great! Especially when added to dip. We like it with fresh veggies or tortilla chips and have it often because we have raw veggies with dinner frequently. This is a variation I came up with of the many Beau Monde based dips that are out there. It may be a bit salty to some so feel free to start out with a tad less Beau Monde if you want. When made with Greek yogurt (one of my favorites!) and light mayonnaise it tastes almost the same as the full fat version. I've also made it into a very yummy salad dressing by cutting back a bit on the sour cream and mayo and adding some milk.


    Dilly Dip

    1 C sour cream or Greek yogurt
    1/2 C regular or light mayonnaise
    1 T Dijon mustard
    2 t Beau Monde seasoning
    1 1/2 t dried dill
    1/2 t onion powder

    Stir all ingredients together in a small bowl. Easy peasy!

    Yield: 1 1/2 cups, about 10 servings

    blackberry peach cake

    Posted By: Rynisma - 14.30
    this cake combines two of my absolute favorites: blackberries and peaches. blackberries make an appearance pretty frequently around here, so it's no surprise they're one of my favorites, but i have yet to profess my love of peaches.


    i get my love of peaches from my father. one of my favorite summer memories growing up is my dad cutting up perfectly ripe peaches, mixing them with a healthy dose of sugar. he'd have juice running down his arms, dripping off his elbows, and i'd often sit at the counter with him, talking about whatever it is teenage girls talk to their fathers about, waiting patiently for him to hurry up and be done so i could dig in. while i'm sure most people eat their peaches as shortcake or some other fancy pants dessert. for us, a spoon was enough. as an adult, i look forward to peach season the most and eat one almost every single night i can get my hands on a fresh one. and every time i do it, i think of my dad and wish for a split second that i could be back there again.

    blackberry peach cake
    adapted from the world in my kitchen
    1 hour, serves 8-12

    1 cup fresh blackberries
    2 fresh, ripe peaches, peeled and sliced
    1 stick (1/2 cup) unsalted butter, room temperature
    3/4 cup sugar
    2 eggs
    1 teaspoon vanilla
    1 cup flour
    2 teaspoons baking powder
    1/4 teaspoon salt
    1. preheat your oven to 350F. grease a nine inch springform pan and set aside.
    2. in a large mixing bowl, beat and butter and sugar until light and fluffy, about five minutes.
    3. beat in the eggs one at a time and then add the vanilla. add half of the flour and mix. add the baking powder, salt, and rest of the flour and mix until combined.
    4. pour the batter into the greased pan and spread batter evenly over the bottom. arrange the peach slices around the top of the cake and sprinkle with blackberries.
      bake for about 40 minutes, until golden brown and a toothpick comes out clean. let cool in the pan for 10 minutes. carefully remove the ring around the pan and serve warm or cool completely.
    check out other sweet treats at sweet tooth friday

      Selasa, 13 September 2011

      Brown Sugar Banana Cake

      Posted By: Rynisma - 23.41
      I'm not a fan of bananas. The flavor and texture are just unpleasant. That doesn't stop me from occasionally buying a bunch to snack on at school- darn them for being so healthy and portable- but they're definitely not my favorite fruit. A week or so ago my husband bought a bunch to take to work in the mornings but as of today, there was one lonely looking brown banana sitting on our counter. Usually I would feed it to my bunnies because they love bananas (one once got into my bag and ate an entire banana, peel and all), but the other day I ran across the Banana Snack Cake recipe at at the Tried-and-True Cooking with Heidi blog right here.

      Backstory: Shortly after I graduated from high school I babysat a pair of adorable two year old twins and their mom made the only banana bread I've ever enjoyed. I've held out hope all these years that I might find another recipe like hers (she just threw some ingredients together so couldn't tell me what exactly she did) so decided to give Heidi's Banana Snack Cake a whirl. The verdict? Delicious, with a light banana flavor! Who would have thought that vegan banana bread was the best? I wholeheartedly look forward to having this for breakfast the next few days.

      Of course I had to change the recipe a tad. First I added a wee bit of salt, then 1/2 teaspoon butter flavoring because I had some in the pantry and thought it might be good. You could probably leave it out if you don't have any. The original recipe calls to top the cake with powdered sugar after baking, but I don't really like the flavor of powdered sugar and it's messy. There WAS however a measly 1/4 cup of brown sugar left in the bag and I felt morally obligated to add some cinnamon (I love cinnamon) so I just mixed them up and sprinkled them on top of the cake before baking. The brown sugar melted and ended up tasting like the bottom of a cinnamon roll! So much better than banana bread baked in a loaf pan because you get a much higher ratio of topping to cake :oD


      Brown Sugar Banana Cake

      1 2/3 C flour
      1 C packed brown sugar
      1 t baking soda
      1/4 t salt
      1 small overripe banana
      1/2 C water
      1/3 C vegetable oil
      1/2 t vanilla extract
      1/2 t butter flavoring (optional)

      Topping:
      1/4 C packed brown sugar
      1/4 t cinnamon

      Grease an 8 by 8 pan and preheat the oven to 350. Stir together dry ingredients. Mash the banana with a fork in a small mixing bowl. Stir in water, oil and extracts. Add to dry ingredients and stir just until combined. Spread in prepared pan. Stir together remaining brown sugar and cinnamon, then sprinkle over batter. Bake 15 minutes, then cover with aluminum foil (shiny side up) to prevent the topping from burning. Bake about 10 more minutes or until a toothpick inserted into the center of the cake comes out clean. Note: The brown sugar topping will make the cake look uncooked so be sure to test it anyway! Serve warm or cooled.

      Yield: 9 small squares

      Taco Pizza (aka Leela's Bean Pizza)

      Posted By: Rynisma - 23.35
      My husband and I are big Futurama fans and anyone who likes Futurama will recognize the name of this recipe! I actually made it yesterday and this is just a picture of the leftovers, but whatever. We like leftovers here because as much as I enjoy cooking, I also enjoy being able to reach into the fridge or freezer and pull out something I already made. This pizza was thrown together with things I already had on hand, specifically the delicious Green Tomato Salsa that I shared earlier.

      I should add some disclaimers to the pizza dough. About 5 years ago when I started on my quest for the perfect pizza crust recipe, this is the first one I tried (it's Pizza Dough I from Allrecipes). It was disappointing because it's quite dense since it barely has any time to rise. After trying many, many pizza dough recipes, I finally found one that we love (will post it later). For this pizza, however, I decided to go back to my first ever dough recipe because it's dense and thick and I thought it would hold up well to the heavy toppings (specifically the beans). I was right! Feel free to make this recipe for other pizzas because it's definitely easy, but in my opinion, it would do best with pizzas with tons of toppings that need a sturdy crust. 16 Meat Monster Pizza? Yes. Cheese Pizza? No.

      Note: I wrote out the directions assuming you have a stand mixer. It may seem counter intuitive to mix up the dough with a spoon first if you have a stand mixer to do it for you, but trust me, you will save a LOT of time doing it by hand first. If you don't, the dough hook will just kind of bat at the flour and you'll spend 15 minutes watching it twirl around while you scrape down the sides of the bowl before the ingredients finally turn into a ball of dough. Not much fun for little Harpo.

      Now if you don't have a stand mixer, just mix it all up with a spoon to start with and then dive in with your hands. It may take a little longer and be a little messier but it will turn out just fine.

      Also, you'll probably notice there isn't any meat on this pizza. I didn't have any and the beans and cheese are full of protein already, but feel free to toss on some cooked taco meat if you feel so inclined!


      Quick Pizza Dough

      3 C flour
      1 T sugar
      1 t salt
      1 packet yeast
      2 T oil
      1 C water

      Stir together dry ingredients in mixer bowl. Stir in water and oil and mix with a spoon until mostly combined. Attach bowl to electric mixer and mix with dough hook until dough is homogenous and slightly sticky, like a big wad of chewing gum. Knead in a tiny bit more flour or water if needed to get the right texture. Grease a large baking sheet and press dough into an approximately 14 by 11 inch rectangle (you can wet or grease your hands first if the dough sticks to them), then roll the sides over slightly to make a crust. Place in cold oven and then turn it to 375. You don't want to preheat the oven because the yeast will at least get a chance to think about rising if you let it hang out in the oven while it preheats. Bake 15 minutes or until cooked through when poked with a fork (crust should still be pale).

      To transform into Taco Pizza, you will need:

      1 can refried beans OR 2 cups of leftover homemade refried beans
      Mexican hot sauce of choice (we like Tapatio and Cholula), optional
      8 oz grated cheese of choice (I used mozzarella but cheddar, jack or colby would be good)
      4 oz can diced green chiles OR a couple tablespoons of canned diced jalapenos
      small can of sliced black olives, drained
      a handful of cherry tomatoes, quartered (or a big tomato chopped up)

      Additional toppings for when it's out of the oven: shredded lettuce, sour cream, salsa, taco sauce, crushed tortilla chips, diced onion... whatever sounds good!

      When pizza crust is cooked, remove from oven and spread the refried beans evenly over the top. You don't have to heat up the beans or anything first. Sprinkle with the hot sauce if you're using it. Sprinkle with grated cheese and top with the green chiles/jalapenos, olives and tomatoes. Put back in the oven and bake at 375 about 10-15 minutes or until the cheese is as golden and bubbly as you want. Let cool a couple of minutes, slice, and serve with the additional toppings.

      Yield: 8 slices, about 4 adult sized servings.

      Enjoy! I hope you like Leela's Bean Pizza as much as we do.

      Green Tomato Salsa

      Posted By: Rynisma - 23.34
      Look, my first recipe to share! This year I grew a little container garden for the first time. Everything was planted in kiddie pools and I grew 4 kinds of lettuce, zucchini, peas, a couple herbs, and 4 kinds of tomatoes. Oh, those tomatoes! Everything did well except for them. It wasn't until after I planted all 8 plants that I learned tomatoes don't do well here because it's too cold. In spite of having a particularly chilly and wet summer, I did get about 15 delicious ripe tomatoes but that left me with a few bajillion green ones.

      After making fried green tomatoes (good but only used up 2 of them) and rotini with green tomatoes and feta (very good tasty!), I was able to use up a few more of them in the Mexina Salsa Verde recipe from Allrecipes.com. The recipe needed a good amount of tweaking but we're happy with how it turned out. Definitely different than both regular salsa and salsa verde made with tomatillos, but still tasty and a great use for those millions of unripe 'maters! My version of the recipe makes a lot so we gave some away, ate some with chips, put some on taco pizza, and put the rest in the freezer for later. I'll probably make the rest of the tomatoes into green salsa too.

      A few things to note: First of all, this recipe uses one of my favorite convenience products. Frozen diced onions! I hate chopping onions because the eyes on fire sensation really detracts from my enjoyment of cooking, so I buy the frozen ones most of the time. This salsa recipe uses an entire 12 oz bag. Also, you can either dice the tomatoes if you want chunky salsa or just chop them roughly if you want to put the salsa in the blender and get a smooth sauce (which is what I did this time around). You could also put the onions in after cooking the tomatoes if you want a stronger flavor. I guess you could try not cooking the green tomatoes at all but if you take a bite of a raw one, it makes your mouth feel really weird and dry which isn't something I want when I'm trying to enjoy salsa. Lastly, you could use lime juice instead of vinegar and I'm sure it would be delicious. My husband doesn't like too much citrus flavor in foods that aren't dessert so I only put in a little since I need him to help me eat the truckload of salsa I made.


      Green Tomato Salsa

      about 2 1/2 lbs green tomatoes, diced or chopped roughly
      12 oz frozen diced onions (about 2 diced fresh onions)
      1 C water
      3 cloves minced garlic
      2 T minced jarred jalapeno
      1/2 bunch cilantro, stems removed
      3 T lime juice
      2 T white vinegar
      2 t salt

      Cook tomatoes, onions and water in a covered pot about 10 minutes or until tender. Let cool. Stir in remaining ingredients and pulse in blender until smooth or else leave chunky.

      Yield: About 7 cups

      classic peach pie

      Posted By: Rynisma - 14.30
      the first pie i made by myself - no help from mom or grandma - was almost exactly ten years ago. it was my second year of college and my friends and i had moved from the dorms into our on campus apartment. we, as i'm sure most college kids do, became our own mini family unit. we grocery shopped together. ate dinners together. bet quarters playing cards all night together and then went out for breakfast in the morning. and that year, before we went home to our own families, we had our own thanksgiving.


      we were adults, planning our first real dinner party,  excited to share our mish mash of family traditions from across the country. it still amazes me how four people so completely different can be alike in so many ways. we ate turkey from michigan, sides from western new york, and apple pie from my mother and grandfather. we cooked all day. cutting, chopping, measuring, baking. i remember it so vividly. we sat at a makeshift table set up in our living room, since we didn't have real dining furniture. and ate and drank and laughed. we stretched it out as long as we could.

      we celebrated our thanksgiving when september 11th was fresh and raw. none of us had seen our parents, family, or really anyone at home waiting for us since it happened. without each other, we were alone. a bunch of alone and scared nineteen year olds. yet none of us talked about it. not a single person uttered a word about something so intense. no, our conversation focused on laughter and stories from home.

      i don't remember much immediately after that. i know i went to my grandparents and ate a huge family dinner just like we still do and have done ever since i can remember. i just don't remember much about that particular thanksgiving at home. but each and every year, at some point in the few weeks between halloween and thanksgiving i always think of the one and only thanksgiving i shared with people other than my family. i don't know what it was about that year, but i haven't made a pie since.

      until last sunday - september 11th to be exact - when i rolled out the dough and sliced peaches. i waited patiently while it baked - it's been so long, do i even know what i'm doing? what if my crust is tough? what if the peaches ooze out? - and even longer while it cooled. i don't know what i was so afraid of, my crust came out perfectly light and flaky and the peach filling has just enough ooze so the filling is juicy but the peaches don't fall all over your plate.

      and while this pie is delicious and really doesn't take much time at all to make, i don't know when i'll be making my next. it seems like pie is something best shared with a large group of people you love. and honestly, my mother and grandfather haven't given up their top spots as thanksgiving pie bakers. i wouldn't have it any other way.

      classic peach pie
      adapted from martha stewart's cooking school

      for the crust
      2 3/4 cups all purpose flour
      1 tablespoon sugar
      1 1/2 teaspoons kosher salt
      1 cup + 2 tablespoons unsalted butter, ice cold
      ice water

      for the peach filling
      2 3/4 pounds peaches, pitted, pealed, and sliced
      1 tablespoon fresh lemon juice
      1/2 cup granulated sugar
      1/4 cup cornstarch
      1/4 teaspoon ground ginger
      1/4 teaspoon salt
      2 tablespoons unsalted butter
      1. make the crust by combining the flour, sugar, and salt in the bowl of a food processor. pulse to combine. add all of the butter, and pulse until the butter breaks down into pea shaped pieces, about ten pulses. add the water, a tablespoon at a time and pulsing after each addition just until the dough starts to come together. remove the dough from the food processor, divide in half, and form each half into a round disc. wrap each dough disc in plastic wrap and refrigerate at least an hour and up to overnight.
      2. when you're ready to make the pie, take the dough discs out of the fridge to warm up just a tad while preparing the peaches. toss the peaches, lemon juice, sugar, cornstarch, ginger, and salt together. set aside.
      3. unwrap one dough disc and flour your board or counter where you will roll it out. roll the dough into a circle large enough to line your pie plate. carefully transfer the dough from your board or counter to the pie plate. carefully push the dough into the plate to line it.
      4. fill the lined pie plate with the peach mixture and dot the top of the peach mixture with the butter. roll out the second dough disc in the same way as the first. carefully transfer the dough to cover the top of your pie. cut the excess dough hanging over the edge of the pie and crimp the edges. cut a few slits in the top of the pie to allow steam to escape while baking. chill the filled - and unbaked - pie for twenty minutes.
      5. preheat your oven to 400F. place a baking sheet lined with aluminum foil in the bottom shelf of your oven (to catch any drips from the pie while it's baking). bake the pie for ten minutes, turn the oven temperature down to 375F and bake for another 70 to 80 minutes. check on the pie after about thirty minutes and if the crust is already nicely browned, drape a piece of aluminum foil over the top to prevent it from burning.
      6. let pie cool completely - at least four hours - before cutting and serving. if the pie is cut before it's cool, the filling will ooze out when you try to serve it.
      check out other sweet treats at sweet tooth friday

        First Post!

        Posted By: Rynisma - 10.13
        Hello! I'm S and I've wanted to start my own little cooking blog for months, so here we are. Picking a blog name sure was hard, it seems like all the great ones have been taken already! For a while I sat around trying to think of a clever name, but my desire to have a blog with an awesome name was preventing me from actually starting a blog so I just ran with Cheese with Noodles. They're two of my favorite foods (especially when made into macaroni and cheese- yum) so why not?

        My plan for this blog is pretty straightforward: share recipes, post a few pictures of what I make, maybe write a little bit about my life. Mostly I hope to share my favorite recipes but I'll also probably post recipes I'm trying for the first time. Just a warning: I am not a fancy cook. Most people like what I cook, but the things that I do best are not dishes you'd find at a snazzy dinner party. If you came for dinner at my house you'd probably be fed chili, fruit salad, cornbread and peanut butter pie. The recipes in my blog will definitely reflect this! Also, I'm no photographer so my pictures unfortunately are not going to look like they came out of a food magazine but I'm more concerned with taste than looks anyway :o)

        I really hope you enjoy looking at all the recipes to come and will find something you'd like to cook yourself. Cooking is such a happy past time for me and it is my hope that the recipes I post will bring happiness to you, too. Please leave me a comment if you like my blog or have something to share!

        Senin, 12 September 2011

        browned butter blondies

        Posted By: Rynisma - 18.04
        DSC_0771 sq


        i've been gone for a while. well, longer than a while. i've missed baking and i've missed my readers and today i decided to take a few hours, un-busy myself, and make something spectacular to get myself back in to the blogging groove. that treat, ladies and gentleman, is browned butter blondies. they actually double as the best air fresheners money can buy - and these are actually edible!


        DSC_0737 sm


        it all starts with butter. five totally magical words. i chopped my butter into rough tablespoons and let them melt over medium heat, swirling every thirty seconds or so. once it all melted i grabbed a spoon and stirred constantly, fearing that i would end up with hardened caramel fused permanently to the bottom of my pan.


        DSC_0758 sm


        the end result is a bowl of pure heaven. liquidy caramel perfection that will take the every day blondie, which i normally don't care very much for, over the top.


        DSC_0761 sm


        with very little effort (seriously, no mixer needed!) after the butter-melting, you have yourself a pan of blondies ready for the oven. i added walnuts to half of mine, due to a request from the peanut gallery/baking assistants, but you can add or not add any toppings you'd like. oh, and good luck trying keep yourself from eating all this raw.


        cat naps


        then you have to wait the thirty grueling minutes until those bad boys can come out of the oven. to pass the time i laid on the floor, supported by my new and on sale target pillows, and kept an eye on my cat. she decided the best place for a nap was directly under my tripod, which i thought would end in disaster. she's more responsible than i give her credit for.


        DSC_0764 sm


        then, the moment of truth. these blondies have a soft, melt-in-your-mouth center and a delicious and crispy edge - my personal favorite part. the walnuts added a really nice nutty flavor and crunch that complimented the browned well. we also tossed around the idea of incorporating bananas somehow, an idea that might be featured on a post in the near future.

        oh, and this recipe was adapted from cooking light, so it is surprisingly not too terrible for you. i ended up halving the recipe, what i usually do when i try anything for the first time, but i would definitely recommend making an entire batch. these will go fast. 


        browned butter blondies
        adapted from cooking light
        yields 24 servings

        ingredients:

        9 ounces (about 2 cups) all purpose flour
        2 1/2 cups packed light brown sugar
        2 teaspoons baking powder
        1/2 teaspoon salt
        10 tablespoons unsalted butter
        2 eggs
        1 egg whites

        directions:

        1. preheat oven to 350 degrees. 
        2. weigh or measure flour, sugar, baking power, and salt in a large bowl. whisk to combine.
        3. slice butter into rough tablespoons and cook in a small skillet over medium-high heat until lightly browned, stirring frequently once butter melts. pour into bowl and let cool, about ten minutes.
        4. once cooled, combine eggs and butter with a whisk. 
        5. pour butter mixture over flour mixture and fold together until just combined. 
        6. pour batter into a greased 9x13 baking pan coated with cooking spray and smooth top with spatula.
        7. bake for 30 minutes or until a wooden toothpick inserted in center comes out clean.
        8. cool completely on a wire rack before cutting.

        nutritional information:

        calories: 170, fat: 4.8g, protein: 1.9g, carbs: 30.5g, fiber: 0.3g, cholesterol: 13mg, sodium: 108mg

        as always, thanks for reading & happy baking!
        amanda

        ps: my sister & i are starting a small baking company in the dc area, so there's a good chance i may be testing out new recipes here. stay tuned for more!


        secret recipe club: butterscotch peach cake

        Posted By: Rynisma - 04.00
        this month, when selecting my secret recipe club recipe, i used the same method i always do - i start by going back as far as i can in the history. and then i look through the posts in the same month i am cooking from them. that way, i get the best of both worlds - reinvent an old recipe and cook something that fits in with the time of year. this month, i adapted katrina's banana caramel cake from baking and boys!

        when i try a recipe and like it, it usually takes a good six months - if not longer - for me to make it again. even some of my favorites - chocolate chip cookies, soft pretzels, white layer cake with blackberry buttercream - i have yet to make again since the day they first appeared here. so it's really rare for me to make the same cake twice. but this cake? i made it twice in three days, a different way each time.


        the first time, i made the cake exactly how it's written below - make the cake batter and swirl the butterscotch into the batter before baking. the result was a nice light cake, similar to a layer cake. the second time - this is the version i brought into work - i made one and a half times the recipe and baked it in a ten inch springform pan. but the key difference is that i mixed the butterscotch into the batter before pouring it into the pan. the result was a dense, almost fudgy cake that could have just as easily been served for breakfast rather than dessert. while i prefer the lighter version in the recipe below, my coworkers spoke loud and clear their love for the dense version. to each his own.

        if you haven't made butterscotch before, it is ridiculously easy, not at all like it's fickle cousin caramel. mix some sugar, butter, cream, pinch of salt, and dash of vanilla together and heat until boiling. that's pretty much it. no fancy temperatures to worry about or caramelizing sugar. ridiculously easy, just as deb said.

        ...and get ready! this post kicks off a week of my all time favorite fruit: peaches!

        for more information on the secret recipe club, including the list of participating bloggers, featured recipes from members, and instructions on how to join, visit the all new secret recipe club website!

        check out my previous src posts belowwhole wheat honey pancakesminted pineapple lime agua frescabreakfast tacos
        simple almond sandwich cookies
        roasted banana rum cake

        butterscotch peach cake
        butterscotch adapted from smitten kitchen, cake adapted from baking & boys
        1hour, makes one nine inch cake

        the butterscotch can be made up to a week or two in advance of making the cake, simply cool to room temperature and store in the refrigerator. i made a double batch of the sauce and used the remainder to drizzle over the cake, eat with apples, etc. not feeling like peaches? try bananas (the original recipe) or apples. i bet both would be amazing.

        for the butterscotch:
        1/4 cup unsalted butter
        1/2 cup packed dark brown sugar
        1/2 cup  heavy cream
        1/2 teaspoon flaky sea salt (or 1/4 teaspoon regular salt)
        1 1/2 teaspoons vanilla extract

        for the peaches:
        3 large peaches, pitted and quartered
        2 tablespoons unsalted butter
        2 tablespoons sugar

        for the cake:
        6 tablespoons unsalted butter, room temperature
        1 cup sugar
        2 eggs
        1 1/2 cups flour
        3/4 cup milk
        3/4 teaspoon baking soda
        1/2 teaspoon salt
        1. make the butterscotch sauce. melt the butter in a saucepan over medium heat. add the sugar, cream, and salt and mix until blended. bring to a boil and cook for about five minutes, whisking frequently. remove from heat and add the vanilla extract. cool to room temperature.
        2. saute the peaches. melt the butter in a large sautepan over medium low heat. add the peach slices and toss with the sugar. cook until the peaches are soft, about five minutes. remove from heat and let cool while putting together the rest of the cake.
        3. heat your oven to 325F. grease one nine inch cake pan. if you want the cake to turn out of the pan, line the bottom with parchment paper. trust me, it will stick otherwise.
        4. make the cake. cream the butter and sugar until light and fluffy. add the eggs one at a time until well blended. in a separate bowl, mash the sauteed peaches with a fork and add the milk. 
        5. add a half cup of flour to the batter, then a third of the peaches. repeat. add the baking soda and salt with the last addition of flour. mix until blended.
        6. pour the batter into the prepared pan. pour the butterscotch sauce evenly over the top of the cake. use a skewer or a knife to swirl the butterscotch into the cake. bake for about 60 minutes, or until a tester comes out clean. cool completely on a wire rack before serving.
        check out other sweet treats at sweet tooth friday!

          Copyright © 2013 Free Food Recipe 24 Hours™ is a registered trademark.

          Designed by Templateism. Hosted on Blogger Platform.