Home Made Cupcake

Jumat, 28 Februari 2014

2/27/14 ChefElla's PB&J Sandwich Cupcakes

Posted By: Rynisma - 17.03
CHEFELLA'S PB & J SANDWICH CUPCAKES

I like cooking shows.  You can get really fun ideas for recipes from the different people you see.  The other night I was watching a show that was a cupcake competition.  I did not particularly care for the cupcakes that the contestants made, but one of them made a cupcake sandwich.  I liked the idea and I could not wait to try it, but I did not know what kind of cupcake sandwich to make.  I thought of all of the sandwiches I have eaten, but none of them sounded good as a cupcake.  Then it came to me.  I could make a peanut butter and jelly cupcake.  I looked through different recipes in books and on the web and did not see anything I liked, but I did find a base recipe for a Peanut Butter Cupcake.  I knew it would be a good place to start for one of my recipes.
ChefElla.

For this recipe you will need to use a mixer and the oven.  If you are not allowed to use a mixer or the oven by yourself you can have a grown up help.
1. Wash your hands.
2. For this recipe you will need measuring cups and spoons, a butter knife, a stand or electric mixer, a rubber
    spatula, a large non-stick muffin pan, a small bowl, a star tip, a heavy duty quart plastic bag.

ChefElla's PB&J Sandwich Cupcakes (This recipe will make 18-24 servings)
Ingredients:
1 3/4 Cups.    All-Purpose Flour
1 Tbl.             Baking Powder
1/2 tsp           Kosher Salt
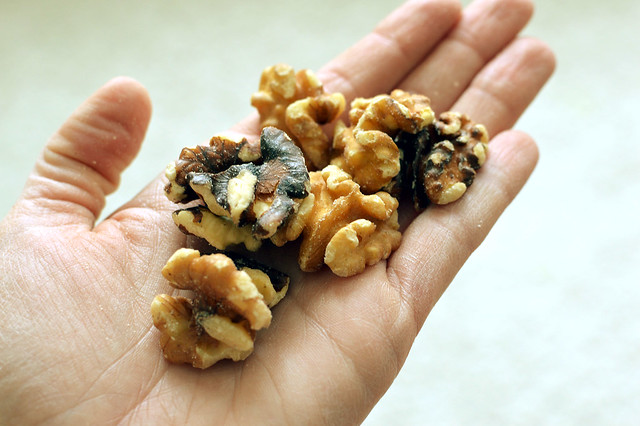
1/2 Cup         Peanut Butter (creamy or chunky)
                      -If you do not use peanut butter you can substitute what ever kind of nut butter you like.
1/4 Cup         Butter
3/4 Cup         Sugar
2 ea.              Large Eggs
1 tsp              Vanilla Extract
1 Cup            Milk
                     -If you do not use milk you can substitute soy, flax, coconut, or any other kind of milk.
1 pkg.            Cupcake Liners
1 Cup            Buttercream Frosting, the not whipped variety is best.
3 Tbl.             Raspberry Jelly
                      -You can use whatever kind of jelly you like best.
1 pkg.            Colored Sprinkles-Pick sprinkles that will match the color of the jelly you picked.
                      Pan Spray


3. Preheat oven to 350F.
4. In a small bowl mix flour, baking powder and salt.
5. Add peanut butter and butter to your mixing bowl and mix on medium speed until the ingredients are well
    combined.
6. Turn your mixer off and add sugar.  Turn mixer on medium and beat the mixture until it is fluffy.  It will
    change to a light tan color.
7. Add vanilla and one egg to the mixer on low.  When the egg is mixed in add the second egg and mix until
    it is mixed in.  Mixed in is when you cannot tell the egg from the other ingredients.
8. Turn the mixer to low and alternate adding the flour mixture and 1 cup of milk.  Add 1/4 of the flour
    mixture to the mixing bowl.  Then 1/4 cup of milk.  When the ingredients are mixed in repeat the process
    until the milk and flour mixture are all mixed into the mixing bowl.
9. Remove the mixing bowl from the stand and scrape the bowl with a rubber spatula to make sure all of the
    ingredients are well combined.
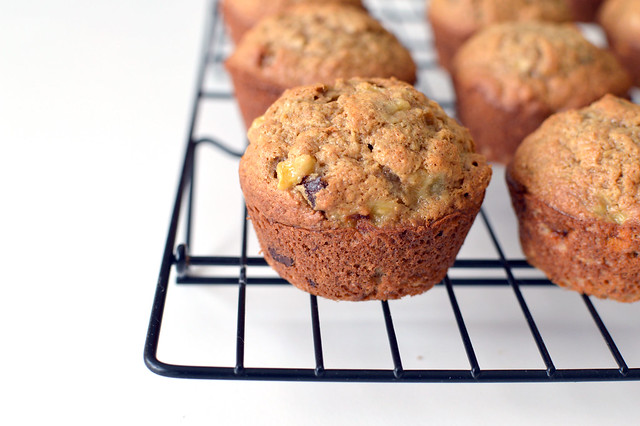
10.  To bake, spray the muffin pan with pan spray.  Add one heaping tablespoon of cupcake batter into
       each of the muffin cups.  Bake for 8 minutes.  Check the doneness by sticking one of the
       cupcakes in the center of the pan with your butter knife.  If the knife comes out clean the cupcakes
       are done.  If not cook for 2 more minutes.
11.  Turn out your cupcakes and let cool on a plate.  Repeat step 10 until all of the batter is gone.
12.  Spread out your cupcakes liners.  In the bottom of each liner add one of your mini-cupcakes with
       the flat side facing up.
13.  In your small bowl add your frosting and jelly and mix well.  It may be a little soupy but it is ok.
14.  Cut a small hole in the bottom corner of the quart bag and put your star tip through the hole.
15.  Fill the bag with frosting.
16.  Squirt 1 tablespoon of frosting on top of your mini-cupcakes in the liner.  Top with another mini
       cupcake flat side down to make your sandwich.  Repeat the process until all of your cupcakes are
       made into sandwiches.
17.  Squirt more frosting on top of your cupcakes.  If you know how to make designs you can do that
       also.  Top your cupcakes with the sprinkles and then refrigerate for 1 hour.  This will make the
       frosting set.
       -If you do not have a star tip simply spread your frosting on with a butter knife.

Make your own recipe by trying different kinds of cupcakes and different flavored frostings until you have your own secret recipe.
Enjoy.

- ChefElla

Kamis, 27 Februari 2014

skillet gnocchi with ham, peas & mushrooms

Posted By: Rynisma - 17.59
want a one skillet meal that pleases everyone, is infinitely adaptable, and can be on the table in 30 minutes? then this skillet gnocchi is for you! want more vegetables? add them. prefer a meatless option? skip the ham. change up leftover chicken breasts or grilled or roasted vegetables by tossing those in. not a fan of swiss? try cheddar or monterrey jack. endless options, all delicious.


skillet gnocchi with ham, peas & mushrooms
adapted from food network
30 minutes, serves 4

1 tablespoon unsalted butter
1 onion, diced
8 ounces mushrooms, sliced or quartered
1/2 pound carrots, sliced
8 ounce ham steak, cut into bite size pieces
1/2 cup chicken broth
17.5 ounce package gnocchi
1 cup thawed frozen peas
1/4 cup heavy cream
1 cup shredded swiss cheese
  1. heat a large skillet over medium heat and add the butter. add the onion, mushrooms, and carrots and cook until softened, about 5 minutes.
  2. add the ham and cook until the ham is lightly browned, a couple minutes.
  3. add the chicken broth and 3/4 cup water and bring to a simmer. add the gnocchi, stir, cover, and cook until tender, about 5 minutes. 
  4. remove from heat and stir in the peas and cream. season with salt and pepper. mix in the cheese until melted and serve. 

Senin, 24 Februari 2014

pork tenderloin with mustard maple sauce

Posted By: Rynisma - 17.57
my favorite meals are those that can be thrown together from things i already have in my pantry. like  chicken with mustard sauce, cacio e pepe with lemon, skillet glazed pork chops, and almond crusted chicken fingers this pork is full of flavor, is ready in thirty minutes, and i already had all of the ingredients, including a pork tenderloin stashed in the freezer. this one went into my favs board asap!


pork tenderloin with mustard maple sauce
adapted from dainty chef
30 minutes, serves 4

3 tablespoons dijon mustard
1 pound pork tenderloin, trimmed
1/4 cup cider vinegar
2 tablespoons maple syrup
preheat your oven to 425F.
  1. coat the bottom of a large, ovenproof skillet with oil and place over medium high heat. rub 1 tablespoon mustard over your pork. season with salt and pepper. add pork and brown a minute or two on each side. transfer the pan to the oven and roast about 15 minutes, or until the pork is 145F.
  2. transfer the pork to a cutting board and tent with foil. while the pork rests, place the skillet on medium heat, add the vinegar and bring to a boil, deglazing the pan. whisk in the maple syrup and remaining 2 tablespoons dijon. simmer about 5 minutes, or until thick.
  3. slice the pork and serve with the sauce. 

low fat whole wheat cinnamon rolls (no yeast required!)

Posted By: Rynisma - 10.23

I like to think I have pretty good self control. I don't buy shoes just because they're on sale. I make myself coffee at home every day instead of splurging at Starbucks. I avoid eye contact with the Reese's peanut butter cups as I'm checking out of the grocery store. 

But, we all have our weaknesses, and when it comes to the smell of warm, pillowy, cinnamon sugar goodness, I'm a goner. (Seriously, when I'm alone in an airport, I feel like I have to strategically plot my course to avoid any and all Cinnabons.)

In an effort to satisfy these cravings, and not end up missing a flight just to be found under a pile of empty Cinnabon containers, I had to find an easy, healthy, and quick recipe for cinnamon rolls that I could feel good about. These babies don't need any yeast, take about thirty minutes to whip up, and reheat like a dream. Basically, perfection. My self control thanks me. 


I will admit, things start out a little weird, but trust me on this one. Applesauce is cut into the flour mixture to get the dough started. You can use a pastry cutter for this, but I prefer to use two forks - the last thing I need is another kitchen gadget! Then, the almost-dough gets chilled for ten minutes.


This is a very handy time to get your cinnamon-sugar mixture together and get your butter melted for the filling. (Wouldn't be a cinnamon roll without it!)


With the addition of milk and vinegar, the dough comes together easily. I did 80% of the work in the bowl and finished the kneading off with my hands on the counter. Feel free to add a little more flour if your dough is too tacky. 


Once you get your dough rolled out to about a 1/2 inch thick, things started to get a little messy. At this point, you want to brush on the melted butter, sprinkle the cinnamon sugar mixture evenly, and roll the dough into a log. Once it's rolled up, you can even out any bulges - I find my middle to always get a little thicker than the rest. Then, slice your log into twelve even sections.


Okay, okay. You caught me. I totally said twelve, but only have ten. It was early and I was feeling generous! Either way, you want to make sure you space your rolls out so they have room to grow and bake all the way through.


When they come out of the oven twenty minutes later they will look so good even your kitten will want one. But, if you let them cool for a few minutes while you make a quick icing, they will be taken from "so good" to "life changer". 


And they totally are.


Healthy Whole Wheat Cinnamon Rolls (No Yeast Required!)
Yields 12 servings

Ingredients

1 cup all purpose flour
1 cup whole wheat flour 
2 1/2 teaspoons baking powder
1/2 teaspoon salt
5 tablespoons unsweetened applesauce (I used one small container)
1/2 cup skim milk (can substitute almond)
1 teaspoon white vinegar 
1 tablespoon butter, melted
4 tablespoons sugar 
2 teaspoons cinnamon

3 tablespoons powdered sugar 
1-2 tablespoons skim milk
1/4 teaspoon vanilla


Directions

1. Preheat oven to 400 degrees.
2. In a large bowl, combine flours, baking powder, and salt. Add applesauce and combine until shaggy. Chill in refrigerator for ten minutes.
3. Combine 3 tablespoons sugar with cinnamon and mix.
4. Melt butter and let cool.
5. Remove dough from refrigerator and add milk, vinegar, and remaining 1 tablespoon of sugar. Combine until dough comes together into a tacky ball. Remove from bowl and knead, adding extra flour if necessary. 
6. Roll dough into an oval shape, about 1/2 inch in thickness.
7. Brush on melted butter, sprinkle with cinnamon sugar mixture, and roll into a log. With a sharp knife, cut into 12 even sections.
8. Grease a pie pan and place rolled sections cut side down. Space evenly for even cooking.
9. Bake for 20-25 minutes or until puffed and golden brown.
10. While rolls cool, combine powdered sugar, milk, and vanilla. Pour over rolls and enjoy!

Note: These reheat fantastically in the microwave! 
Vegan Option: Substitute Earth Balance for butter and almond milk for skim.

Nutrition:

Calories: 111, Fat: 1g, Carbs: 25g, Protein: 3g

Happy baking!

Amanda

Jumat, 21 Februari 2014

mini peanut butter caramel & ganache tarts

Posted By: Rynisma - 20.16
remember back in january when i teased making chocolate truffles for valentine's day this year? i completely and totally forgot. and made these obnoxiously good tartlets instead.


valentine's day fell on a friday this year, which meant i would be home all day and could make pretty much whatever i wanted for dinner and dessert. i quickly skipped the thought of making an elaborate dinner, i'd rather spend my time on a good dessert. it's no secret that peanut butter and chocolate are two of jason's favorite things and his favorite combination, so as soon as i saw this tart i knew it would be perfect - with a couple small tweaks.

instead of making one large tart, i went with tartlets, knowing that one would probably be enough for the both of us - and it was. the tart needs something crunchy and salty - salted peanuts mixed into the caramel worked really well. and since neither of us are huge fans of white chocolate, i subbed some dark chocolate. these things were amazing, one of the easiest, fanciest looking desserts i've made in a long time.


mini peanut butter caramel & ganache tarts
adapted from spache the spatula
makes 4 mini tarts

i spent an afternoon making these. you'll see there's actually not a whole lot of active time; much of it is spent waiting for the dough to chill, waiting for the caramel to cool and set, waiting for the ganache to set. the crust and caramel (steps 1 & 2) could be done the day before you plan to serve them, leaving assembly, making ganache, & waiting for it to set (steps 3 & 4) to the second day.

when i made these, instead of scaling the caramel recipe by a third, i made a full batch of it. i had about a cup and a half left over. trust me, it did not go to waste. if you want to have extra on hand, the quantities in brackets represent a full - about 2 cups total - batch.

for the crust:
1/4 cup sugar
4 tablespoons unsalted butter
1 egg yolk
3/4 cup all purpose flour
2 tablespoons dark cocoa powder
1/4 cup mini chocolate chips

for the peanut butter caramel:
1/3 cup sugar [1 cup]
1/3 cup + 1 tablespoon heavy cream [1 1/4 cups]
1/4 cup creamy peanut butter [3/4 cup]
about 3 tablespoons chopped salted peanuts [1/2 cup]
hearty pinch of sea salt

for the ganache:
4 ounces dark chocolate
6 tablespoons heavy cream
  1. make the crust. cream the butter and sugar with a mixer until light and fluffy. add the egg yolk and mix until combined. add the flour and cocoa and mix until combined. stir in the chocolate chips. scoop about 3 tablespoons of the mixture into a mini tart pans. repeat with the remaining mixture, filling 4 pans total. don't spread the mixture and chill for 1 hour. preheat your oven to 350F. using your fingers, smooth the dough along the bottom and up the sides of the pans. bake for about 15 minutes. as soon as they come out of the oven, use the bottom of a drinking glass or measuring cup to press the dough back into the pan. let cool completely.
  2. while the crust is baking and/or cooling, make the caramel. add the sugar to a heavy bottom saucepan and make sure it's spread out pretty evenly. heat over medium low heat until medium brown. slowly pour in the cream. your caramel will seize, that's ok. continue cooking and whisking or stirring for about 15 minutes, or until smooth. remove and discard any hard chunks of sugar that didn't dissolve. stir in the peanut butter, salted peanuts, and sea salt until the peanut butter is melted and creamy. let cool at room temperature. 
  3. once the crusts are cool, fill each with two tablespoons of the caramel. let set at room temperature or in the refrigerator. the caramel must be set before topping with the ganache. 
  4. to make the ganache, heat the heavy cream in a saucepan over medium low heat just until it simmers. add the chocolate and whisk until smooth. top each tart with about four teaspoons of ganache. let set at room temperature or in the refrigerator.


Kamis, 20 Februari 2014

2/20/14 ChefElla's Mock Creamy Wild Rice Soup

Posted By: Rynisma - 05.58

CHEFELLA'S MOCK CREAMY WILD RICE SOUP

I love wild rice soup.  If you have never eaten it before you should really try it.  It is so creamy and rich and flavorful that I could eat it every day.  But I know that it is not good to eat rich food every day, so I decided to make a recipe that I could eat more often.  My wild rice soup is a mock (fake) wild rice soup because it does not have cream, butter, or flour in it.  The soup still tastes creamy and rich and the best part is that you will not be able to tell the difference between my soup and the real one.
If you do not know what wild rice is, it is actually not a rice, but the grain of a particular type of grass.  It cooks like rice and has a nutty flavor.  If you like it you can cook and eat it just like rice.
ChefElla.

For this recipe you will need to use a knife and the stove.  If you are not allowed to use a knife or the stove by yourself you can have a grown up help.
1. Wash your hands.
2. For this recipe you will need measuring cups and spoons, a knife, a cutting board, a medium stock
     pot, a small bowl, a mesh strainer, a blender, a peeler and a wooden or plastic spoon.

ChefElla's Mock Creamy Wild Rice Soup (This recipe will make 4-6 servings)
Ingredients:
1 Lb.      Chicken Breast or Tenders, cut into bite size pieces
               -Remember kids like ChefElla have little mouths, so the pieces should be small for a kid, not
               small for a mom or dad.
3/4 cup   Carrot, cut into bite sized pieces (3 - 4 small carrots)
1    cup   White Onion, cut into bite sized pieces (1/2 medium to large onion)
3/4 cup   Celery, cut into bite sized pieces (3 medium celery stalk)
               -Wash celery stalk.  Cut brown ends off of celery.  Cut celery in half lengthwise.  Cut each
               half of celery lengthwise again.  You can continue to do this until the pieces are as thin as you
               want them.  Chop the celery stalks into small pieces.  The thinner the celery is cut, the smaller
               the pieces will be when you chop them.
6 cups     Chicken Stock
1 cup      Wild Rice, Raw
2 cups     Cauliflower, Raw (8oz)
1 tsp       Kosher Salt
1/2 tsp    Black Pepper
1/4 tsp    Garlic Powder
2 tsp       Kitchen Bouquet
               -You can use other browning liquids like Maggi seasoning, but they can have MSG in them.
               If you do not like MSG or if you have an allergy to it, just use Kitchen Bouquet.
2 Tbl        Olive Oil

3. Cook your wild rice according to the directions on the package (generally the ratio is 1 to 4.  This
    means that for every 1 cup of rice you will need to cook it in 4 cups of water.
4. Cut your carrots (peel carrots with your peeler before cutting), celery and onions.  Set aside in your
    bowl.  Cut your chicken into small pieces.
5. When the rice is done strain it through your mesh strainer.  Return your pot to the stove and heat on
    medium high heat.  Add two cups of chicken stock, cauliflower and 1 cup of cooked wild rice to
    your pot.  Cover and simmer for 15 minutes.
6. Put cauliflower, wild rice and stock into you blender and puree (mix on a high speed until it is a
    paste).
7. Return the pot to the stove and turn on medium.  When hot add 2 Tbl. olive oil.  Add carrots, onion
    and celery.  Spread the vegetables evenly on the bottom of the pan.  Let the vegetables sweat on the
    bottom of the pan for 3-4 minutes  without stirring (sweating is when the vegetables cook on a lower
    heat so that they do not become brown but still cook).  The onions will begin to look clear.  Turn the
    pot onto high heat and add the chicken.  Mix the chicken into the vegetables.  Stir every 45 seconds
    to a  minute until all of the chicken is white in color.
8. Add the spices, kitchen bouquet, wild rice, cauliflower puree and stock to the pan.
9. Bring the soup to a boil, turn to low heat and serve.

Top your soup with crackers, serve with bread, or whatever else you can think of.  
Enjoy.

- ChefElla

Selasa, 18 Februari 2014

salted chocolate chip peanut butter oatmeal cookies

Posted By: Rynisma - 14.00
my favorite cookie needs two things: chocolate + one bowl + no refrigeration time. that way i can go from no cookies to eating cookies in under 20 minutes. because let's be honest; when i want a cookie, i want it now. not tomorrow after waiting for dough to chill. this cookie meets all of those criteria plus a bonus: peanut butter, jason's favorite cookie. toss in some oats and top with sea salt just for kicks and in 20 minutes you'll be eating fresh cookies too.


for more cookie inspiration, check out the other 57 in the archives or the 130+ i've pinned for later.

salted chocolate chip peanut butter oatmeal cookies
adapted from how sweet eats
makes 3 dozen

8 tablespoons unsalted butter, melted and cooled
6 tablespoons creamy peanut butter, melted and cooled
1 cup brown sugar
1/2 cup granulated sugar
1 egg + 1 egg yolk, room temperature
2 teaspoons vanilla extract
1 1/4 cups flour
1 cup oats
1/2 teaspoons baking soda
1/4 teaspoon salt
1 cup dark chocolate chips or chunks
sea salt for sprinkling the tops of the cookies
  1. preheat your oven to 325F. line a baking sheet and set aside.
  2. in a large bowl, combine the butter, peanut butter, brown sugar, and granulated sugar and mix until combined. add the egg, egg yolk, and vanilla and mix until combined. 
  3. add the flour, oats, baking soda, and salt and mix until combined. fold in the chocolate chips.
  4. shape about 1 1/2 tablespoons of dough into a ball and place on the baking sheet a couple inches apart. sprinkle the top of each cookie with sea salt. bake for about 12 minutes or until the edges are golden brown. let cool for a couple minutes on the baking sheet before transferring to a wire rack to cool completely. store in an airtight container.

Sabtu, 15 Februari 2014

healthy classic banana bread

Posted By: Rynisma - 20.02


I wouldn't say that I use baked goods to bribe people, but I do think there is a certain incentive to agree to a favor when there are, let's say, cookies involved. That's what happened a few weeks ago when I had the opportunity to photograph the National Cathedral and hoped to borrow some extra equipment from a friend. I generally shoot with a light body and a short lens, but I wanted a few back up options, knowing that I probably wouldn't get the chance to shoot from the rafters of the building again. In return, I promised a loaf of banana bread.

To be honest, my Mom is kind the banana bread guru in my life and I rarely make it myself. Nevertheless, I decided that having a healthy version in my arsenal wouldn't hurt, especially given how comforting a warm slice can be in the dead of winter when I'm dreaming of picking fresh fruit and dressing in less than three layers.

I took advantage of the snow day (fellow D.C.-ers, are you dug out yet?) and the super ripe bananas I had been waiting on to test out this lightened-up version of a classic quick bread. Embarrassingly, I doubled the butter needed to get this recipe started and decided it was a sign to just make a double batch! I ended up with a full loaf and twelve muffins, which means I've got snacks for the week. I believe the term "happy accident" would be appropriate here.


Quick tip: I keep my baking bananas in a brown paper bag with the top folded over. Science tells me that helps them ripen faster than just sitting on your counter due to gases being emitted and the concentration of said gases and other concepts that I just don't have room in my brain for. All I know is, it works.


Banana bread is great on its own, but walnut and chocolate chips really take it to the next level. I pulled out some unbroken walnuts to decorate the top and give it that professional "did YOU make this?" quality.


Once I had all my dry ingredients ready to go, I added the walnuts and chocolate and gave it a good toss in the flour mixture. I find the coating helps suspend them in the batter and helps avoid having a bottom layer consisting of chocolate and nuts. 


Also, since I live on the wild side, while most recipes call for you to really mash the bananas well, I like to be a little more gentle to I get pieces of fruit throughout the bread. (Okay, maybe I just really like mix-ins! You never want to share a pint of ice cream with me, unless plain vanilla is your thing.)


Since the loaf was a gift, you'll have to trust that the muffins adequately represent the perfect texture of this bread. (For those of you going the muffin route, they only take about 14-17 minutes in the oven!) 


The best part about banana bread? It really does get better over time. I find that it's best the second or third day, which makes it a great bake-ahead project.

Healthy Classic Banana Bread
Adapted from Cooking Light
Yields 14 servings

Ingredients:

1 cup whole wheat flour
1 cup all-purpose flour
3/4 teaspoon baking soda
1 teaspoon cinnamon
1/2 teaspoon salt
1/2 cup brown sugar
1/4 cup white sugar
1/4 cup butter, softened
2 large eggs
1 1/2 mashed ripe bananas (about 2 bananas)
1/3 cup 0% plain Greek yogurt (feel free to use honey, banana, or vanilla flavors)
1 teaspoon vanilla extract

Optional: 1/2 to 3/4 cup mix-ins

Directions:

1. Preheat oven to 350 degrees.
2. Cream butter and sugars together on medium speed, about one minute. Add eggs, one at a time, beating well after each addition.
3. Add banana, yogurt, and vanilla, and beat on medium speed until blended.
4. Sift or whisk together flours, baking soda, cinnamon, and salt.
5. Add dry mixture to wet mixture and combine on low until just blended. Do not over-mix! (I avoid this by letting my stand mixer do about 50% of the work, then mixing it the rest of the way by hand. Over-mixing leads to tough breads, which no one likes!).
6. Spoon batter into a loaf pan that has been greased with cooking spray and bake for 40-45 minutes, or until a knife speared through the center comes out clean.
7. Cool on wire rack for ten minutes, remove from pan, and let cool completely. 

Nutritional Information:

Calories: 165, Fat: 3.85g, Cholesterol: 39mg, Carbs: 28g, Fiber: 2g, Protein: 4.5g

(For comparison, Starbucks' Banana Bread has nearly 500 calories a slice!)

slow cooker honey mustard drumsticks with tangy apple slaw

Posted By: Rynisma - 14.00
i've mentioned before how big of a fan i am of my slow cooker. now that we're in the thick of winter, there are few things better than coming home to a big pot of soup, stew, or chicken, with relatively little work. the problem is that i quickly get sick of those things - there's only so much chicken breast i can eat. so i was pleasantly surprised when flipping through my copy of slow cooker revolution to find a couple recipes for drumsticks. these are delicious - just enough sweetness for my taste and crispy from the blast in the oven at the end. coupled with the slaw and a loaf of italian bread, it is a nice reminder of food to come in the summer.


looking for some other great slow cooker recipes? check out the archives or my slow cooker board on pinterest.

slow cooker honey mustard drumsticks
adapted from slow cooker revolution
10min prep, 6+ hrs cook, 30min finish; serves 4-6

about 4 pounds bone in chicken drumsticks
2 tablespoons brown sugar
1 1/2 teaspoons garlic powder
1 1/2 teaspoons onion powder
1 teaspoon dry mustard
3/4 cup dijon mustard
1/2 cup honey
  1. place the drumsticks in a 4+ quart slow cooker. mix sugar and dry spices together and rub all over chicken.
  2. mix dijon and honey together. pour about half of the mixture over the chicken and toss to coat. cover & refrigerate the remaining mixture.
  3. cover and cook until the chicken is tender, at least 6 hours on low.
  4. heat your oven to 450F and line a baking sheet with aluminum foil. transfer chicken to the baking sheet. if the skin is falling off the chicken, you can either remove it completely & discard or try to put it back on the chicken. either way works.
  5. brush the chicken with about half of the reserved dijon honey mixture. bake until crisp, about 10 minutes.
  6. flip chicken and coat with the remaining dijon honey mixture. bake an additional 10 minutes until crisp. serve with the slaw.

tangy apple slaw
adapted from slow cooker revolution
10min prep, 1hr wait + 10min active, 1hr chill; serves 4-6

1 mini cabbage or half a head of green cabbage, chopped
1/4 cup cider vinegar
3 tablespoons sugar
3 tablespoons vegetable oil
1 1/2 teaspoons dijon mustard
pinch red pepper flakes
1 granny smith apple, cut into matchsticks
1 scallion, thinly sliced
  1. toss the cabbage with 1 1/2 teaspoons salt and let drain in a colander until wilted, about 1 hour.
  2. in a small saucepan, bring the vinegar, sugar, oil, dijon, and red pepper flakes to a boil over medium heat. stir and simmer just until the sugar is dissolved. remove from heat.
  3. while the dressing is boiling/cooling, prep the rest of the slaw. rinse cabbage with cold water, dry in a salad spinner, and transfer to a large bowl.
  4. toss with the apple, scallion, and dressing to coat. chill in the refrigerator until cold, about 1 hour.
2014.03.10 this was ilona's kitchen's pick for the secret recipe club!

    Jumat, 14 Februari 2014

    Chicken Cacciatore with Mushrooms & Bell Pepper

    Posted By: Rynisma - 00.05
    Here's another winner from Kate at Our Best Bites!  I don't think I've ever had a dud recipe from there, and this Chicken Cacciatore was extremely good.  Like, serve it to company good.  I can definitely see why this recipe is a lifelong favorite of Kate's.  It's just perfect- the chicken, bell pepper, and mushrooms are right at home in the robust, rather spicy, wine tinged, velvety tomato sauce.  A keeper for sure!

    My version of this is a tiny bit different from the original.  Used more chicken (actually 1 3/4 lb, but I'm freakishly picky about fat and stuff on meat and lost about 1/4 lb when I was cutting it off), divied up the pepper a little bit differently, and the recipe suggested using more mushrooms if you love them, which we do.  The big change, though, is that I did not cook this in the slow cooker.  I was afraid the chicken would get dried out since the pieces are so small and you brown it on the stove first.  The internet told me that chicken cacciatore is often just simmered over low heat for an hour, so that's the route I decided to take and it worked out smashingly.

    We had this over spaghetti, but right as the spaghetti was finishing cooking, my husband came home with a spaghetti squash and I think the leftovers will be wonderful with it.

    Chicken Cacciatore

    6 T olive oil, divided
    1 onion, chopped
    6 cloves garlic, minced
    1 C white wine (not cooking wine, it's very salty and just gross)
    1 1/2 C chicken broth
    6 oz can tomato paste
    1/2 tsp salt
    1/4 tsp pepper
    1/4 t dried marjoram
    1/4 t dried thyme
    1/4 C flour
    1 t salt
    3/4 t pepper
    1 1/2 lbs chicken breasts or thighs, cut into bite sized pieces (I actually used 1 3/4 lbs)
    1 bay leaf
    2 C sliced mushrooms (about 5 ounces by weight)
    1 green bell pepper, sliced

    Brown onion in 2 Tbsp of the oil in a large nonstick skillet over medium-high heat.  When onion is almost done, add garlic and cook until golden.  Remove skillet from burner and spoon the onion and garlic into a blender.  Add tomato paste, wine, chicken broth, 1/2 tsp salt, 1/4 tsp pepper, marjoram, and thyme to blender and blend until completely smooth.

    Place flour, 1 tsp salt, and 3/4 tsp pepper in a gallon sized Ziploc bag and shake to mix.  Add the chicken and shake until it's evenly coated. Place the remaining 4 Tbsp oil in the skillet and heat over medium-high.  Add chicken and any excess flour and cook, stirring frequently, until browned (does not need to be cooked through).

    Add blended sauce to the chicken in the skillet along with the bayleaf, mushrooms, and bell pepper.  Cover skillet and cook at a low simmer for one hour, stirring occasionally.  The chicken, mushrooms, and bell pepper should be cooked through and tender.

    Serve cacciatore over pasta, spaghetti squash, or steamed broccoli with a bit of parmesan on top.

    Yield: 6 to 8 servings

    Rabu, 12 Februari 2014

    Garlicky Bacon & Cheddar Stuffed Burgers with Avocado

    Posted By: Rynisma - 23.23
    Tonight's dinner was originally going to be Chicken Cacciatore (a recipe that I'll share later if it turns out well), but right when I was about to put the ingredients in the slow cooker, I came upon some photos of a cheese stuffed burger called a Juicy Lucy.  The Juicy Lucy (or Jucy Lucy, if you prefer) is a cheese stuffed burger from Minneapolis.  Burgers aren't usually my favorite thing, but for whatever reason, a cheese stuffed one sounded perfect today!  When looking for a recipe, I decided to combine two of them:  the idea of adding bacon came from Cinnamon Spice and Everything Nice, the burger recipe itself came from this one on AllRecipes, and I used cheddar, lots of garlic, and served the burgers with avocado on top because I felt like it!

    I'm happy to say that the burgers turned out awesome.  Sadly, all of mine did end up leaking cheese a bit (really seal those edges!), but the burgers don't seem to have suffered for it at all and the leaked cheese kind of cooked onto the bottom of the burgers.  My husband and I both agreed that this burger is better than just a bacon cheeseburger.  No issues with the bacon falling off the burger this way, and the cheddar was super melty and stretchy instead of just half melted on top..  The avocado was also a perfect, creamy addition.  Tomato and lettuce would have been nice on top, but the burgers were so thick already that they would have been impossible to eat!  Instead, we had a salad on the side.
     

    Sorry if the half gnawed burger looks unappealing, I wanted to show the inside but didn't want to cut my burger in half!

    Garlicky Bacon & Cheddar Stuffed Burgers with Avocado
     
    1 T vegetable oil
    4 slices sharp cheddar
    6 slices bacon
    2 T dried minced onion
    1 T Worcestershire sauce
    1 t garlic powder
    1/2 t salt
    1/2 t pepper
    1 1/4 lb ground beef
    1 avocado, peeled and sliced
    hamburger buns and whatever condiments you like (we did ketchup, mustard, and mayo)
    Fold each slice of cheese in half, then in half again so each slice ends up as a little stack of 4 small pieces.  Cook and crumble the bacon. 

    Mix together meat, onion, garlic powder, salt, and pepper, just until well combined.  Divide meat mixture into quarters, then form each quarter into 2 equal sized balls.  Working with one burger's worth of meat at a time, flatten the two balls into uniform patties, each about 5 inches in diameter.  Place a quarter of the crumbled bacon into the center, then top with one of the folded stacks of cheese.  Top with the other patty and firmly pinch together the edges of the two patties.  Repeat process with the rest of the meat.
    Heat oil in a large nonstick skillet over medium high, and when the pan is hot, add the burgers.  Cook until browned on one side, then flip them over and poke the center in a few places with a toothpick.  This will help release steam inside the burger and help prevent the cheese from gushing out while the burgers cook.  Cook the burger on the second side until the internal temperature of one of the burgers is 160 degrees, then remove them to a paper towel lined plate.

    Let the burgers sit for a few minutes before serving because the cheese inside is very hot.  Serve on toasted buns topped with avocado slices and whatever else you'd like.

    Yield: 4 burgers

    glazed donut muffins

    Posted By: Rynisma - 14.00
    we've been pretty lucky with winn. while the first couple months were rough - he was and still is most days, as a friend of ours has coined the term for her son, an 'ultimate sleep fighter' - once we got past them, he sleeps a solid 12 hours every night and very rarely wakes up. which is why it almost killed the two of us a couple weeks ago when he decided, for a reason we still don't know, to wake up and be generally miserable every two hours. all. night. long. and then be up for the day around 5:00. a full two and a half hours earlier than usual.


    needless to say none of us were happy that morning. luckily it was a wednesday night so i didn't have to work, but was not looking forward to spending a day with a cranky, tired toddler. after refusing every single thing i offered to him for breakfast and the offer to skip breakfast all together and go straight to toys, i offered the one thing i knew would make him happy: let's cook, you can sit on the counter & mix.

    it worked. as soon as i sat him next to the mixer he calmed down. and for the next 15 minutes, while we dumped ingredients in the mixer and watched our batter come together, he was a totally different kid. enthralled with the whole process, excited to help. being a parent is a pretty unbelievable thing. sometimes i have to stop and remind myself that something as seemingly small as making muffins with mama can make his day. it didn't hurt that the muffins were delicious to boot.


    glazed donut muffins
    adapted from the savvy kitchen
    30 minutes, makes 12

    for the muffins
    4 tablespoons unsalted butter, room temperature
    1/4 cup vegetable oil
    3/4 cup brown sugar
    2 eggs
    1 1/2 teaspoons baking powder
    1/4 teaspoon baking soda
    3/4 teaspoon ground nutmeg
    1 teaspoon ground cinnamon
    3/4 teaspoon salt
    1 teaspoon vanilla extract
    2 2/3 cup all purpose flour
    1 cup milk

    for the glaze
    3 tablespoons unsalted butter, melted
    1 cup powdered sugar
    1/2 teaspoon vanilla extract
    hot water

    1. preheat your oven to 425F. grease or line 12 muffin cups with paper liners & set aside.
    2. in a large bowl, beat the butter, oil, and sugar until smooth. mix in the eggs one at a time, until incorporated.
    3. add the baking powder, baking soda, nutmeg, cinnamon, salt, and vanilla and mix until combined.
    4. alternate adding the flour and milk in three additions, mixing after each addition. mix until combined.
    5. divide the batter among the muffin cups and bake until golden brown, about 15 minutes. cool in the tin for 5-10 minutes before removing & cool completely on a wire rack before glazing.
    6. make the glaze right before you want to glaze the muffins. whisk the melted butter, sugar, and vanilla extract until smooth. if the glaze is too thick, add hot water, a teaspoon or so at a time, whisking after each addition, until it's the consistency you want.
    7. when the muffins are cool, dip the top into the glaze. repeat with all of the muffins. if you have glaze left over, let the muffins dry, and dip a second time. store loosely covered. storing in an airtight container will soften the glaze and make it gummy.


    Senin, 10 Februari 2014

    well, well, look who's back

    Posted By: Rynisma - 10.37
    You know when the world makes something so obvious it's hard to ignore? Yup, me too.

    In the past week three interesting things have happened. First, I received a very sweet email from a reader (Hi, Michelle!) asking what had happened to me and my blog. Then, a friend from graduate school asked me if I could share a recipe of a photo I had posted on Instagram. Last, I found out that this little corner of the Internet still receives several hundred page views a day.

    The kind email made me smile to myself and reminisce. The friendly request made me remember how much I love photographing and sharing useful and delicious recipes. But the last tidbit, the fact that people out there (you all!) are still clicking over here (to me!), really got me thinking.

    I know a lot of dust has collected, 882 days worth to be exact, but I've missed this place and connecting with all of you. Plus, it would be downright rude of me to tune out life's very clear sign to get back to blogging, especially since I have kept baking and snapping (far less fancy) photos of the results. To prove it, a sampling of evidence below!


    (White Chocolate Pistachio Biscotti, Whole Wheat Cinnamon Buns, Blueberry Muffins, and Gluten Free Almond Joy Pie)

    Minggu, 09 Februari 2014

    pot roast with mushroom gravy

    Posted By: Rynisma - 14.00
    it was about this time last year that i grew up just a tad bit more and enjoyed ina's pot roast. and while that roast was super flavorful, it had a long list of ingredients, none of them mushrooms. mushrooms are a big hit in our house and mushrooms + beef are one of our favorite combos. lucky for me, claire robinson had a five ingredient pot roast with mushrooms. with the addition of three flavor enhancers from my pantry - garlic, worchestershire, and cornstarch - i have a new favorite. we liked this so much i made it again the following week. not sure what to do with leftovers? freeze them, or blend the gravy completely smooth, chop up the leftover beef, and toss with egg noodles. jason likes that better than the roast!


    pot roast with mushroom gravy
    adapted from claire robinson via the food network
    20 minutes prep, 3 hours cook time, 15 minutes finish

    4-5 pound boneless beef bottom round roast
    1 pound cremini mushrooms, cleaned and quartered
    2 medium yellow onions, halved and sliced
    5 cloves garlic, minced
    4 cups low-sodium beef broth
    worchestershire sauce
    1 pound carrots and/or potatoes, peeled and chopped (optional)
    cornstarch
    1. preheat your oven to 325F. 
    2. pat the roast dry with paper towels and season all sides with salt and pepper.
    3. coat the bottom of a large dutch oven with olive oil and place over medium high heat. once heated, add the roast and cook on each side about 4 minutes, until brown. transfer the meat to a plate.
    4. add the mushrooms to the now empty pan. season with salt and pepper and cook until browned and just starting to release their liquid, about 5 minutes. add the minced garlic and cook until fragrant, about 30 seconds.
    5. add the onions, broth, and a couple dashes of worchestershire sauce. move the mushrooms to the side of the pan and place the roast in the middle. if using, place the carrots and/or potatoes in the liquid around the roast.
    6. cover the pan, bring to a simmer, and transfer to the oven to roast for about 2 hours. carefully flip the roast and cook an additional hour uncovered.
    7. transfer the meat to a cutting board and tent with foil. if using, remove the carrots and/or potatoes from the pot.
    8. place the uncovered pot on medium heat on the stove. use an immersion blender (or regular blender or food processor) to chop the mushrooms in the sauce to your liking. 
    9. to thicken the sauce, ladle about 1 cup into a small bowl and whisk in 1 tablespoon cornstarch until smooth. whisk the mixture back into the pot and cook, whisking frequently, until thickened. if you prefer the sauce thicker, repeat with another 1 tablespoon cornstarch. taste and adjust salt and pepper as needed.
    10. to serve, slice the pot roast and drizzle with gravy.

    Carmelitas

    Posted By: Rynisma - 12.30
    Somehow or other I came upon the recipe for Carmelitas on the Lulu the Baker blog a couple of weeks ago.  I look at a lot of recipes, but sometimes there's one that I must make immediately!  Hop over there to check out the pictures, don't the Carmelitas look amazing?  They look so good that I sent the recipe to my mom, and it turns out she's been making them since she was in high school in the late 1960s!  Apparently Carmelitas won a Pillsbury Bake Off competition back then.  How in the world I've made it to 28 years old without having a) eaten ones my mom made, and b) even having heard of them, is a complete mystery.  That had to be remedied at once!  I'm not a football fan at all, but figured the Super Bowl was a good excuse to make them.

    I followed Lulu the Baker's recipe exactly, except doubled the recipe.  My husband and I had pretty high hopes for the Carmelitas, and let me tell ya- they did not disappoint!  So much gooey, creamy caramel.  So much chocolate!  Delicious oatmeal cookie base!  They are truly divine.  I sent my husband to a Super Bowl party with most of the Carmelitas, where they were promptly gobbled up.

    Quick Note:  I have included vanilla extract as an optional ingredient.  The recipe I followed had no vanilla, but I feel it would be an excellent addition.  Also, next time I'm going to try cutting the cream back to 1/2 cup.  As amazing as the caramel is, I like my caramel to have a bit of a chewy quality and this did not.  It was perfectly gooey and thick and wonderful, I'm just really curious about how the Carmelitas would taste with less cream in the caramel!  Will update this post if/when I ever get around to making them that way.  They're quite perfect as is though so I'm not sure how much I can improve on perfection.


    Carmelitas

    1 1/2 C butter, melted
    1 1/2 C packed brown sugar
    1 tsp vanilla extract (optional)
    2 C quick oats
    2 C flour
    2 tsp baking soda
    12 oz bag semisweet chocolate chips
    18 oz soft caramel candies (I used Werther's brand, the store was out of Kraft)
    1 C heavy cream

    Preheat oven to 350 and grease a 9 by 13 inch baking dish.  Place the butter, brown sugar, vanilla extract, oats, flour and baking soda into a medium mixing bowl and stir until combined.  Press half of the mixture into the bottom of the prepared baking dish.  Bake until the base is golden, about 15 minutes.  Remove pan from oven and top evenly with chocolate chips.

    Place caramel and cream into a medium sauce pan and heat over medium, stirring frequently, until completely smooth.  Pour evenly over cookie base.  Evenly sprinkle the remaining cookie dough over the caramel and return the baking dish to the oven.  Bake until the top is golden, about 20 to 25 minutes.

    Let bars cool completely (about 12 hours) before cutting, it takes quite a while for the caramel to cool down, for the cookie base to solidify properly, and for the flavors of the chocolate and caramel to meld nicely.  You can speed up the process by sticking the pan in the refrigerator, just be sure to let it sit out for about half an hour before attempting to cut up the bars.

    Yield:  About 16 to 24 servings, depending on how small you cut the bars.

    Sabtu, 08 Februari 2014

    Creamy Salsa Dressing

    Posted By: Rynisma - 23.28
    When we were teenagers, my cousin and I loved a bagged salad kit that had a salsa dressing, so one day I experimented in my mom's kitchen and ended up with this dressing.  I've been making it for about 12 years now and finally measured the ingredients tonight.  It's a snap to make, and everyone I've served it to has really enjoyed it.  I've made it with countless types of salsa over the years (green salsa is great, too) and it's always fantastic.  The directions are really just a guideline and how much you need of each ingredient will depend on what salsa you use.  For example, some salsas result in a thinner dressing.  You can just add more sour cream if it's too thin for you.
    This dressing is great made into a side salad with lettuce, tomatoes, a sprinkle of cheese, and some crushed tortilla chips, or you can make it into a dinner salad by also adding cooked taco meat, sliced olives, and sliced avocado.  Whatever you want, really.  We always love having taco salad!  It's also good drizzled over grilled chicken or in turkey wraps.  You can even use cream cheese instead of sour cream and make a dip.


    Creamy Salsa Dressing

    3/4 C of your favorite salsa
    1/2 C sour cream
    1 Tbsp lime juice
    1/2 tsp cumin
    salt to taste (I used 1/2 tsp but the amount will depend on the salsa and your preferences)
    Puree all ingredients in a food processor, blender, or with an immersion blender.  Taste it and add more of any of the ingredients if you think it needs it.  The dressing will stay good in the refrigerator for about a week.
    Yield: 1 1/4 C, about 6 to 10 servings depending on the size of your salads

    Jumat, 07 Februari 2014

    Chocolate Orange Brownie Love Muffins

    Posted By: Rynisma - 07.46
    Somewhere between a fondant and a Brownie but much easier!

    Makes 8 heart shaped puddings


    1 My Secret Kitchen Ultimate Chocolate Brownie Mix
    100g butter, melted
    3 medium egg, whisked together
    1 tbsp. orange liqueur
    8 chocolate orange segments

    Preheat oven 170C.
    This dish works best with a heart shaped silicon mould but failing that, grease and line heart shaped metal moulds. Prepare the Brownie as directed and whisk in the tablespoon of orange liqueur. Divide the mixture equally between the moulds until 3/4 full. Push an orange segment into each mould and then top equally with the remaining Brownie mixture. Bake for 18 - 20 minutes or until just set. Cool slightly before removing from the moulds and serve immediately.


    Ina Fridays: Mac & Cheese

    Posted By: Rynisma - 01.15
    *First of all, please forgive me if the spacing in this post and recent posts is crazy.  Blogger seems to be spazzing out and keeps changing my spacing in already published posts.  How I have it right now looks fine in Firefox and Internet Explorer on my computer, but I'm not sure how it looks on others*

    I've joined a new cooking group!  This is a small group that prepares an Ina Garten recipe once a month.  There are guidelines for the type of recipe each month (such as main dish or appetizer), but other than that, we're free to pick whatever recipe we want.  I'm quite fond of Ina Garten's recipes and a couple of them I've been making for half my life (like Rosemary Roasted Carrots and Parker's Split Pea Soup), so am excited at the prospect of trying a new one of my choice each month.  The fact that I can choose which recipe to make is very nice since I can either choose something that fits my dietary requirements, or else pick something to make as a special treat. 

    This month's assignment was a main dish recipe.  It only took about 3 minutes of digging through recipes on the Food Network website to find Ina Garten's recipe for macaroni and cheese.  What better first recipe to make for a mac and cheese devotee like myself?  I haven't cooked a pasta dish since September, so was pretty excited to make this! 

      
    The recipe was quite easy to make, not any more complicated than other baked mac and cheeses.  I'd never used gruyere, tomatoes, or fresh bread crumbs in mac and cheese and was curious to try them out.  The only thing I changed about the recipe was to cut it in half so we wouldn't have tons of leftovers.  It ended up making a good amount anyway! 

    The recipe came together very well and looked great, but I was a bit nervous when I tasted it before sticking it in the oven.  I have an extremely low tolerance for processed cheese/Velveeta, and to my surprise, the sauce had a processed cheese taste and texture.  It gave me the "Velveeta shudder", never good! 

    Luckily, it was much better after the stint in the oven, and I ended up enjoying the mac and cheese pretty well.  I think my gruyere was to blame.  There were two varieties to pick from at the store, one was $10 a pound and the other $20.  I really didn't want to spend $10 on a little hunk of cheese, so picked the less expensive one, which was softer.  When I tasted it before grating it, it actually tasted like American cheese to me rather than gruyere!  Now I really want to make it again with the firmer, pricier gruyere in spite of the cost, because I'm sure it will taste better.

    The verdict:  Cheese issues aside, this was a really nice mac and cheese, creamy with good flavor.  I didn't need to adjust the seasonings or amount of milk or cheese at all.  The sauce was pretty darn thick, but I wonder how it would be with the better gruyere.  I personally enjoyed the tomatoes on top and the fresh, buttered bread crumbs were really nice.  My husband picked off his tomatoes but thought the bread crumbs were fine, which is a first for him- he usually does not like bread crumbs on pasta.  He rated it 6 stars out of 10, but was raving over it as he ate and had two servings.  I think he'd actually give it a higher rating except that he's extremely devoted to my "signature" mac and cheese recipe (the one the blog was named after, and that he rates "9,000" stars) and was stubbornly opposed to me even making this one.

    All in all, this is definitely a mac and cheese worth making if you want something a little different!  My one suggestion would be to buy good gruyere.


    Ina Garten's Mac & Cheese

    8 oz cavatappi or macaroni
    4 T butter, divided
    1/4 C flour
    2 C milk
    1/2 Tbsp salt
    1/4 tsp pepper
    1/4 tsp nutmeg
    8 oz gruyere (by weight), grated
    4 oz cheddar (by weight), grated
    1-2 small tomatoes, halved and sliced thinly
    2-3 slices bread, crust removed and made into crumbs in the food processor

    Preheat oven to 375 and grease a 2 quart baking dish.  Boil pasta in lightly salted water until tender, and drain.  Make the sauce while the pasta cooks.  Melt 3 tablespoons of the butter in a medium sauce pan over medium heat, then whisk in the flour until smooth.  Cook and whisk for another minute or so, then whisk in the milk in small additions of about 1/4 cup each, making sure sauce is completely smooth before you add more milk.  Cook sauce, whisking frequently, until thickened, then about a minute more.  Remove pan from heat (this is important so the cheese doesn't get gritty), and whisk in the salt, pepper, and nutmeg, then whisk in the cheese a handful at a time until smooth. 

    Stir the sauce into the cooked pasta and spoon into the greased baking dish.  Top with the sliced tomatoes.  Melt remaining 1 tablespoon of butter and mix it with the bread crumbs, then sprinkle it evenly over the pasta and tomatoes.  Bake until the crumbs are golden and the sauce is bubbling around the edges, about 20 minutes.

    Yield:  About 6 main dish servings (I halved the recipe which supposedly would make 3 servings, but those would be truly gigantic servings!)

    Here's a list of the other bloggers that participate in Ina Fridays!
    Chaya at Bizzy Bakes sadly lost her daughter recently.  Chaya, my heart goes out to you and your family!

      Kamis, 06 Februari 2014

      gingerbread deep dish apple pancake

      Posted By: Rynisma - 18.02
      a couple saturday mornings ago i woke up wanting to bake something other than scones. while perusing the refrigerator i remembered a couple lonely apples sitting in the crisper and decided to spice up one of my standbys: deep dish apple pancake.


      while i may be good with some things in the kitchen - my scones are always light & flaky and even if my layer cakes don't look great, they always taste good - pancakes are not one of them. while i love eating pancakes & i've made them a couple times,  i'm not a huge fan of making them. all the flipping, making sure they're actually cooked all the way through but not burnt, and not having them all done at the same time so some of you eat hot pancakes and others eat cold ones, totally turns me off. which is why this pancake is so great. mix everything up, toss it in a pie plate, bake, and serve yourself a wedge. no flipping, no dirty pans to clean, and everyone gets hot food at the same time. it doesn't hurt that the gingerbread flavor is a nice balance of spice and sweet. it may be my new favorite.

      gingerbread deep dish apple pancake
      adapted from this deep dish apple pancake
      30 minutes, serves 4

      2 large or 3 small apples, peeled, cored, and thinly sliced
      1/2 cup sugar
      1 1/2 teaspoons ground cinnamon
      1 teaspoon ground ginger
      1/4 teaspoon ground clove
      1/4 teaspoon ground nutmeg
      3/4 cup pancake mix
      3 eggs
      6 tablespoons milk
      2 tablespoons molasses
      1. preheat your oven to 450F.
      2. combine the sugar, cinnamon, ginger, clove, and nutmeg. add half to the apples and mix to coat. set aside the remaining half.
      3. coat a round pie plate with nonstick spray. add the apples, cover with plastic wrap (try to wrap it so an end of the plastic sticks out, so you can uncover the dish easier when the apples are cooked), and cook in the microwave on high for 5-6 minutes, until soft. be very careful when removing the plastic wrap from the cooked apples. the steam will be very hot.
      4. while the apples are cooking, combing the pancake mix, eggs, milk, and molasses until smooth.
      5. when the apples are done, uncover, and add the pancake mix. sprinkle the top with the remaining cinnamon sugar mixture.
      6. bake uncovered for 10 - 12 minutes, or until light brown. let cool in the pan a couple minutes, or the juices from the apples will run when you slice it. serve with warm maple syrup. store leftovers tightly wrapped in the refrigerator.

      2/6/14 ChefElla's Sweet & Sour Eggrolls

      Posted By: Rynisma - 17.19

      CHEFELLA'S SWEET & SOUR EGGROLLS

      I know that vegetables are good for me, but sometimes I do not like eating them.  Then I remembered, every time I eat chinese food, I eat vegetables.  I really like the eggrolls from the chinese restaurant, but I know that fried foods are not good for me.  So this week I made some good for me eggrolls.  For my eggrolls I picked vegetables that I like and I baked the eggrolls so they were better for me.  For your eggrolls you can pick the vegetables, meat and sauce that you like knowing that they will be better for you then the eggrolls from the restaurant, and you will get healthy from eating your vegetables.
      Enjoy.
      ChefElla.

      For this recipe you will need to use the stove, the oven and a knife.  If you are not allowed to use the stove, oven or knife by yourself you can have a grown up help.
      1. Wash your hands.
      2. For this recipe you will need measuring spoons and cups, a strainer, a knife, a cutting board, a heat proof rubber spatula, a baking sheet, aluminum foil, a saute pan and a mixing bowl.

      ChefElla's Sweet & Sour Eggrolls (This recipe will make 10 - 12 eggrolls)
      Ingredients:
      1 lb.           Ground Pork
                         -You can substitute ground turkey, chicken, shrimp or tofu if you like them better.
      1 Cup         Green Onions, Thin Sliced (About 6 green onions)
                         -Wash your green onions and then cut off the root ends.  Slice the whole green onion
                         including the green and white parts.  
      3 Cups       Broccoli Slaw, you can find it in the produce section of the supermarket.
      2 Cups       Broccoli, tiny pieces
                         -Buy one small head of broccoli.  Cut the florets (fancy word for the top of the broccoli)
                         away from the stem.  Cut your broccoli into tiny pieces.
      2 tsp.          Fresh Garlic, Minced (minced means to chop the garlic into very, very small pieces)
                          -If you do not have fresh garlic you can use 1/2 tsp granulated (dried) garlic.
      1 Tbl.         Canola or Vegetable Oil
      1 can          Pan Spray (Pam or other brand of spray oil)
      2 ea            16 oz Jars of Sweet and Sour Sauce
                         -If you do not like sweet and sour sauce you can use teriyaki, peanut, hoisin, or any other
                         kind of Thai or Chinese sauce your like.
      12 ea          Egg Roll Wrappers, you can normally find them in the produce section of the supermarket.           

      3. Pre-heat your sauté pan on the stove on medium high heat.  Pre-heat oven to 425F.
      4. Add ground pork to the pan.  Stir frequently in the pan and break the meat apart while it cooks.
          When the meat is no longer pink it is done.  Pour your ground meat into your strainer.
          You so not want the eggroll mix to be wet so the juice and oil will drain away from the meat.  Return
          your pan to the stove, but do not clean it.
      5. Cut your green onions and measure out the rest of the ingredients.
      6. Heat your pan on medium heat.  Add oil to the pan.  Add all of your vegetables and cook for 3-5
          minutes.  Stir every so often so the vegetables do not brown or burn.  Add 1/4 cup water to the pan
          and let the vegetables cook for 1-2 extra minutes.
      7. Put the cooked pork into your large mixing bowl.  Pour your vegetables into the strainer.  Let
          vegetables sit for 5-10 minutes.
      8. Line a baking sheet with aluminum foil.
      9. Mix vegetable, meat and 1/2 cup of Sweet and Sour sauce in your mixing bow.  Mix well.
      10. Dampen one paper towel or dish towel.  It should not be very wet.
      11. Put your eggroll wrapper onto your cutting board.  Top wrapper with 1/4 cup of mix, and spread
            the mix out.  While you are making one eggroll cover the other eggroll wrappers with your damp
            cloth otherwise your eggroll wrappers will dry out and crack and you will not be able to roll them.


      12. Fold the bottom of the wrapper up over the mix.
      13. Fold in the sides of the wrapper.  Keep the sides straight.  Using your finger dampen the top triangle
           of the eggroll with water wrapper.  The water will make the eggroll stick and stay closed.

      14. Roll up your eggroll and set aside.
      15.  Repeat the process until all of your eggrolls are done.
      16.  Spray your pan with pan spray and put eggrolls onto the pan.  Spray the finished eggrolls with pan
             spray.
      17.  Put eggrolls in the oven and bake for 15 minutes.
      18.  Serve eggrolls with the remaining sweet and sour sauce.

      Enjoy
      - ChefElla

      Copyright © 2013 Free Food Recipe 24 Hours™ is a registered trademark.

      Designed by Templateism. Hosted on Blogger Platform.